Saturday Sites: Week Twenty-Five

IMG_3652

  1. My hearing sucks. I mistake things people say all the time… These misheard lyrics are spot on in my mangled-hearing-brain.

  2. I secretly/not-so-secretly LOVE jelly doughnuts. These baked ones? Perhaps. They are worth the try in my book!

  3. This commercial had me dying of laughter. I never want to meet a vagician.

  4. These words from my newly 29-year-old heart are totally needed.

  5. I love the beauty of simplistic, delicious cakes. This one easily goes that list!

  6. This quiz says my spirit animal is a bear. “Like a bear, you are strong and confident. You don’t second guess or doubt yourself. You are tough in the face of adversity. If anything, having a challenge sharpens your mind and senses. You are born to lead, and you have no trouble taking action when the time is right. You are very proactive. You are rough when you need to be, but you are rarely hard on those in your life. You are a caretaker. You know a lot about healing and emphasize its importance. You know how to heal yourself and others. You take a lot of time for quiet, solitude, and rest. You don’t exert yourself unless it’s necessary.” What’s yours?

  7. I remember the majority of these toys

  8. I’m intrigued by the spicy sweetness of this cocktail!

  9. Bwahaha… Numbers 10, 13 and 21

  10. One of the best/infamous scenes from When Harry Met Sally, done as an improv performance… Hah!

  11. I love the color of this bread.

  12. Old people selfies are quite excellent!

  13. I knew some of these kitchen hacks, but a lot of them I also never heard of…

  14. This ice cream may or may not just blow. my. mind.

  15. 8 rules for altering baking recipes… Good to know!

  16. I could eat tofu every single day. This dish sounds like something I’d thoroughly enjoy!

Posted in Saturday Sites | Tagged | Leave a comment

Blueberry Chai Jam

IMG_9696

Up until last summer, canning anything really terrified me. I was certain I would create jars of botulism-ridden, bacteria filled foods and most definitely kill someone. Unintentionally. (Ahem.) Then I made some jams, I made and canned squash pickles, dill pickles, green bean pickles, pesto and marinara sauces, diced tomatoes… and I didn’t accidentally sicken anyone while sharing!

IMG_7340

Recently blueberries have begun to make their beautiful blue-purple appearance in the Pacific Northwest. These fresh berries are sweet and juicy, and although it often feels like it’s quite the splurge to indulge in the cost of these organic blueberries, I usually give in. They’re excellent by the handful, on yogurt, in muffins, pies, tarts, ice cream

But over the last few years, I think my favorite way to enjoy them is in jam, year round. I like simple, plain jam… and then I also enjoy flavorful, spiced jams. I love stirring a spoonful of either type into vanilla yogurt or my bowl of oatmeal. I decided to add some chai flavors to the following blueberry jam. The result is warmth, sweetness, earthy spiciness that balances nicely with the blueberries.

There is a certain loveliness about jams, jellies, and preserves you’ve canned yourself. I especially enjoy giving a jar of them as a gift, as I know the time, love, focus, and heart that goes into each batch. (Plus if it didn’t taste good, I wouldn’t let it leave my kitchen.) My intention with this blueberry jam was to enjoy its summery, warming flavor dead in the middle of winter-to-come. However, I seem to have issues with eating it by the spoonful. May you have more self-control than I! :) But if not, I totally condone eating this jam as quickly as you want.

IMG_9712

Blueberry Chai Jam

Yields about 8 half-pint jars.

Ingredients:
8 cups fresh blueberries, stems removed
3 3/4 cups unrefined cane sugar
2 tablespoons fresh squeezed lemon juice
1 vanilla bean, split and scraped
1 1/4 teaspoons ground cinnamon
1 ceylon cinnamon stick
1 teaspoon ground cardamom
1/2 teaspoon ground ginger
1/2 teaspoon ground nutmeg
1/4 teaspoon ground anise
1/4 teaspoon ground cloves
2 teaspoons vanilla extract

IMG_7367

Directions:

First of all: since this is a canned preserve, it’s important to make sure your jars and lids are sterilized.

Next, place a plate in the freezer to use to test the readiness of the jam once its done.

Begin by sterilizing your jam jars. Boil the empty jars in a large stockpot of water, with at least one inch of water covering them for at least ten minutes. Leave the jars in the water, turn the burner off and begin making the jam.

Place the blueberries, sugar and fresh lemon juice together in a large heavy bottomed pot. Let the juices macerate for about 15 minutes. Add the vanilla bean (scraped insides plus the pod), cinnamon stick and spices. Bring the mixture to a low simmer for about 40 minutes, stirring occasionally, until the jam reaches 220-225 degrees F and remains at that temperature steadily for at least 10 minutes. If the mixture foams up a bit that is totally normal, just keep it simmering.

After 40 minutes, test the jam on the plate that has been in the freezer. Spoon out a teaspoon of the jam onto the plate and let it sit for a minute. If you pick up the plate, tilt it and the jam does not run, it’s done. Stir in the vanilla extract.

Bring the water the jars were sitting in back to a boil and pull out the jars. Spoon jam into each jar and wipe the top edges with a damp towel. Then place the lids and caps on the jars and immerse back into the boiling water for 15 minutes, with at least an inch of water covering the tops.

Once the jam is done, set on the counter to cool until you hear the ever-glorious-and-satisfying POP! indicating your jars sealed correctly. Wait until completely cooled to check that the jars sealed. If any didn’t properly seal, simply place in the refrigerator and consume! Keep stored at room temperature for up to 1 year for best flavor.

IMG_9685

IMG_9721

IMG_9683

Posted in Breakfast, Canning, Jams, Sauces, Snacks | Tagged , , , , , , , , , , , | 1 Comment

Loaded Baked Potato Salad

photo 4

Ever since I was little, when it came to potato salad, I’d be the first one to wrinkle up my nose in disgust. UGH! POTATOES! was my general feeling. Did I have any good reasons? No, but I didn’t care. French fries and potato chips didn’t count as potatoes in my mind. Baked potatoes, mashed potatoes, potato salad, on the other hand… No thank you very much. My distaste for potato salad was two-fold, however. First, it was made primarily of potatoes. (DUH.) Second, it was also heavily laden with mayonnaise. Another “food” I both wouldn’t and couldn’t make myself eat. (Unless it was in my mom’s Hawaiian style potato-macaroni salad, with homemade Japanese pickled cucumbers!)

In college, however, one of my girlfriends had a chef for a father and she often cooked in our dorm kitchen as well. I remember it being close to the end of the school year and she’d been asked to bring a couple dishes to a party event. She made a huge sheet of blondies topped with fresh raspberries and candied pecans and a potato salad, wherein she roasted all of the potatoes before cooling them and mixing them into a salad.

I realized that the potato salads I have not enjoyed in the the past simply lacked a lot of flavor. The potatoes weren’t salted enough when cooked, the mayonnaise was the only prominent taste, there wasn’t much added to the salad overall to make it feel like more than potatoes and mayo… So stealing from my girlfriend’s idea, I decided to attempt a potato salad that carried a lot of flavor. I wanted to roast the potatoes with a lot of garlic, then put together a potato salad that was reminiscent of a loaded baked potato — you know, the ones that have sour cream, chives, bacon, cheddar cheese, etc. This potato salad doesn’t lack in flavor! It’s great on its own or as a side to your favorite picnic dishes.

photo 3

Loaded Baked Potato Salad

Ingredients:
6 cups cubed red potatoes (about 4 large potatoes)
10 cloves garlic, minced finely
2 tablespoons olive oil
1 teaspoon sea salt
1 1/2 teaspoons creole seasoning
1/2 teaspoon granulated garlic
4 strips seitan bacon, cooked until crisp then broken into small pieces
1/2 cup sour cream
1/2 cup vegenaise
2 teaspoons apple cider vinegar
1 teaspoon granulated garlic
1 teaspoon creole seasoning
1/2 teaspoon ground black pepper
2 ounces sharp cheddar, grated
1/2 cup chives, chopped
salt to taste

Directions:

Preheat your oven to 425 degrees F. In a large mixing bowl, toss together the cubed potatoes, minced garlic, olive oil, teaspoon of salt, one and a half teaspoons creole seasoning and the half teaspoon granulated garlic until all the potatoes are evenly coated. Spread on one or two large baking sheets in a single layer. Bake for 25-30 minutes, until fork-tender, flipping halfway through the cooking time. Allow the potatoes to cool to room temperature.

tatersalad

While the potatoes are baking, prepare the dressing. Whisk together the sour cream, vegenaise, apple cider vinegar, granulated garlic, creole seasoning and pepper until thoroughly combined.

Place the cooled potatoes in a large mixing bowl. Add in the prepared dressing, grated cheddar and chives. Gently fold together until well mixed. Taste and add salt to your liking. Cover and refrigerate until cold before serving.

photo 1

photo 5

photo 2

Posted in Appetizer, Salad, Sides, Snacks, Vegetarian | Tagged , , , , , , , , , , , | Leave a comment

Day to Day Life: Week Twenty-Four

A look at the last week:

IMG_3335
HeyBabyBirds are getting bigger. Since this photo early in the week, they’ve grown feet twice as big, lost some of the yellow fuzz, and entered into what I call “ugly baby” stage. Teehee.

IMG_3341
Found some love in my tiny little watermelon…

IMG_3491
Fake green chili chik’n…

IMG_3489
Which immediately joined the taco-making dinner party.

IMG_3383
Bourbon for my last day of being 28!

IMG_3388
And what did my birthday bring? A wait at the DMV because I had to get a license renewal! Woooo!

IMG_3398
My birthday was low-key delightful. My husband surprised me with a new gorgeous teal-blue enamel cast iron pot, some other kitchen goodies, and a beautiful new bamboo-fabric dress. We had a lunch picnic with Silas as it was his last day of 3rd grade, then my mother in law gifted me a deliriously good chocolate cake and two cookbooks I’ve been wanting for some time: the Joy the Baker cookbook and the Cheese Board Collective cookbook.

IMG_3487
For my birthday, my husband and I decided to go on a downtown adventure here in Ashland, as there are a number of new restaurants and we rarely go out. We found ourselves at the new Granite Taphouse. We ordered a couple beers and this tasty lobster dip, topped with sweety drop peppers, served with flatbread made from their 150-year-old Italian sourdough starter. Delicious!

IMG_3485
I also ordered a dry manhattan, which was incredibly tasty!

IMG_3493
On our walk through the park after a couple drinks, we ran into Vincent who had met up with some friends.

IMG_3424
Creamy, cheesy polenta in my new pot! Roasted vegetables — all of which came from our garden! And grilled veggie sausages. Dinner for the kids, my husband, mother-in-law and I. We successfully ate the entire pot of polenta, which pretty much happens n-e-v-e-r.

IMG_3445
HeyBirds!

IMG_3431
One oatmeal recipe that rarely gets complaints around here… Brown sugar cinnamon apple!

IMG_8984
This boy turned 9 this week!

IMG_3456
We had a couple boys over for a sleepover… Friday the 13th, full moon, birthday shenanigans. Including four large pizzas. One veggie-pepperoni, two cheese, and one pesto mushroom (Silas’s favorite).

IMG_3495
This girl had to spend the night at Nana’s when we had the kids over… just because she can be unpredictable these days when it comes to snipping at peoples’ hands… and to cut down on the craziness of two large dogs and a bunch of little kids in one small house. She was happy to come back home the following evening.

IMG_3470
Watermelon juice is my favorite summer beverage!

IMG_9311
The water in Emigrant Lake gets lower and lower the warmer it gets…

IMG_3497
Picking perfectly ripe avocados makes me happy.

IMG_3479
When slapped into a vegetarian burrito? Even better!

IMG_9354
Somebody got a rugged micro 30 gun for his birthday… I am not a fan of guns in general, but went along when he and the boys went to shoot them.

IMG_3483
Happy Father’s Day to all you dads out there…

Posted in Day to Day, Kids, Life, Photography | Tagged , , , , , , , , | Leave a comment

Saturday Sites: Week Twenty-Four

sat24

  1. I wouldn’t mind visiting just about all of these quirky places someday.

  2. This is my kind of dessert! Or breakfast…

  3. Oregon open skies are certainly lovely.

  4. Many of these photos are mind-stretching, beautiful, and interesting.

  5. This cake! Please and thank you.

  6. These 3-D renderings of human beings is wonderfully weird and creepy to me.

  7. I am certain, this is in our near-future.

  8. This post made me laugh. I am guilty of doing this. Except numbers 4 and 5. I just verbally, consistently, declare these.

  9. Wonderful, beautiful things you get to do when you are a parent! Number 13! Number 15! Bwahaha.

  10. I want to make this pasta and its sauce immediately.

  11. This article on the practice and necessity of handwriting fading out is fascinating.

  12. People and their doughnut doubles!

  13. Speaking of doughnuts… Yes, please.

  14. What emotion are you guided by? I got hope: You are a very hopeful person. You always see the glass as being half full, and for you, things can always improve and thrive. Your life is guided by your ability to see the bright side in every situation, to think of the rainbow after the storm. You always believe things can get better, and there could not be a better way to view this life. Keep up with the positive attitude and spread it around, we all need some more hope in our hearts.

  15. I’m curious about this zucchini sauce

  16. These words, for you.

  17. And these Thai curry noodles, for me. Or us.

Posted in Saturday Sites | Tagged , , , , , , , | Leave a comment

Chocolate Cupcakes with Almond Butter Swiss Meringue Buttercream

IMG_6380

Can I tell you something? I have enjoyed cooking and baking since I was a little kid. Most often for other folks, as in that was the sole purpose I baked things or spent my allowance on extra candy I’d stow in my backpack on the way to school. I gave these baked things or candy things to girlfriends. More often I gave them to the current boys I had embarrassing middle school crushes on. Mind you, I was not good at making things (thus the eventual candy-buying instead of treat-making). There were fall-apart things, raw-in-the-middle-things. But I was a shy, quiet, introverted girl and if the only way I was going to make friends was to bribe them with food, heck yes let’s get on that.

When bake sales came up at school, I was always ready to volunteer some kind of treats… cookies that miraculously turned out edible and cookie-looking, brownies from store bought mixes that I dusted with powdered sugar because that was going to make them look homemade and decadent. These days, I am not in school. But I’ve got stepchildren who are and when bake sales or class parties come up, they don’t exactly hesitate on volunteering some food contribution. But guess who exactly is volunteered?

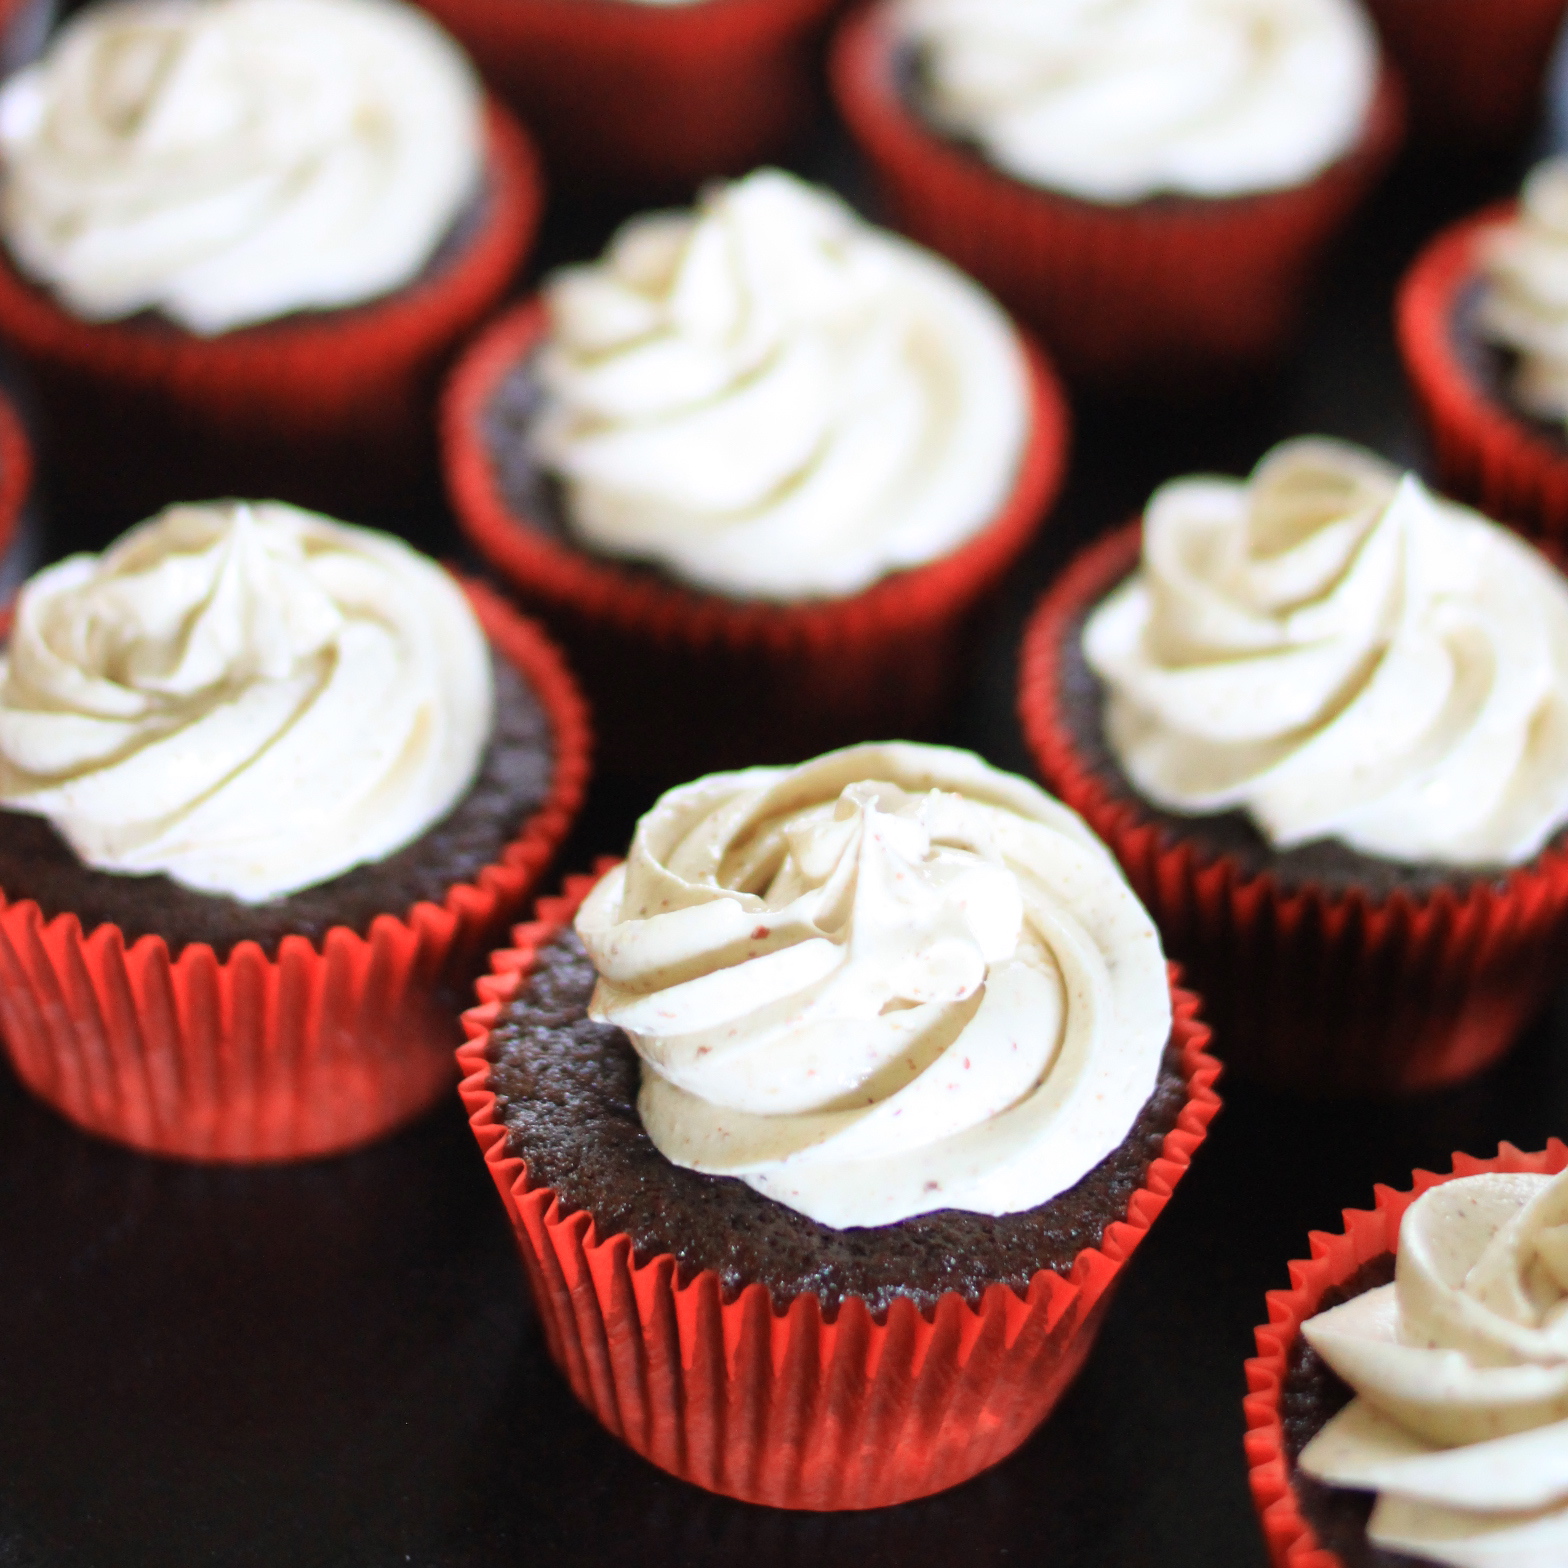
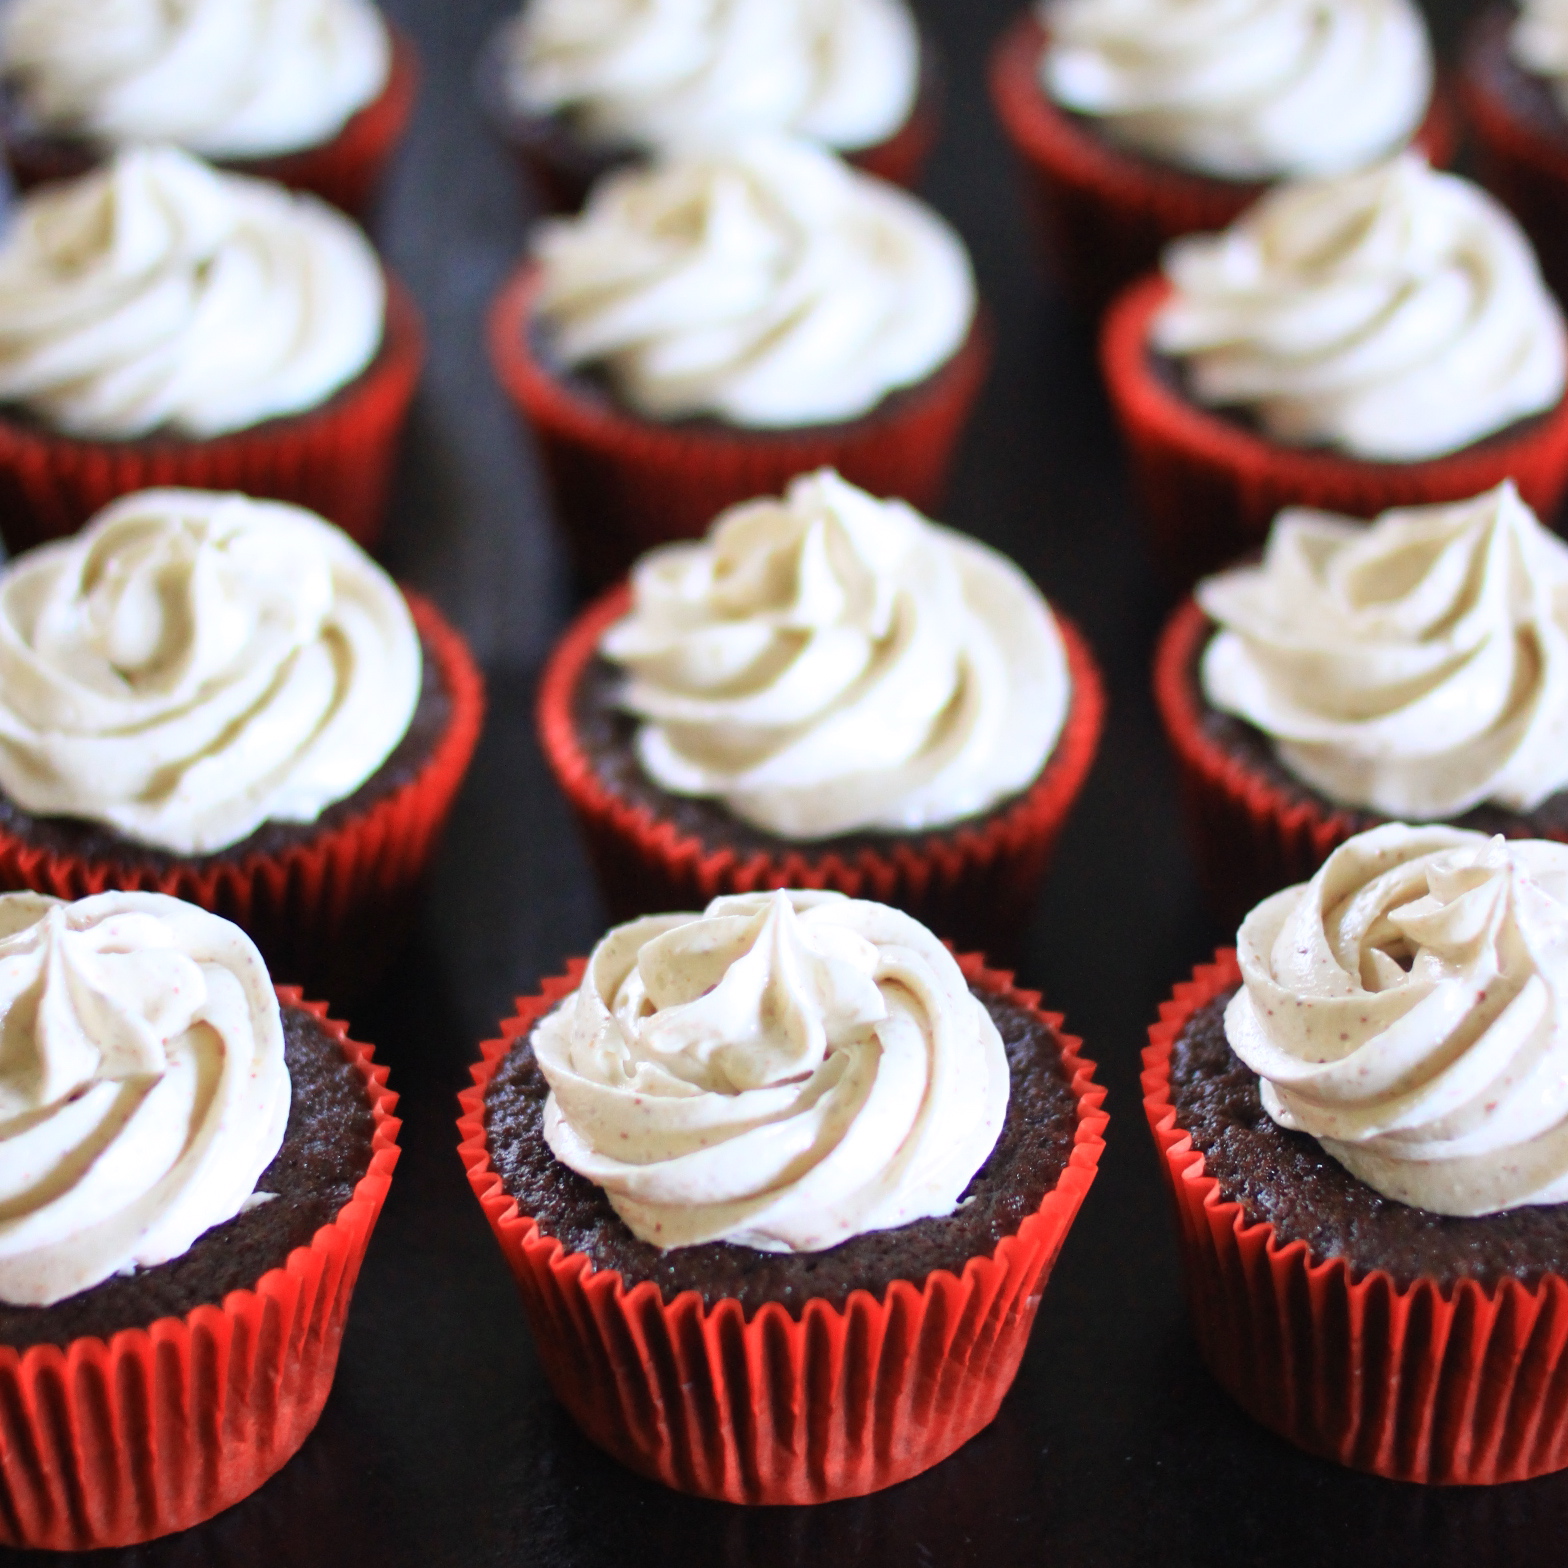
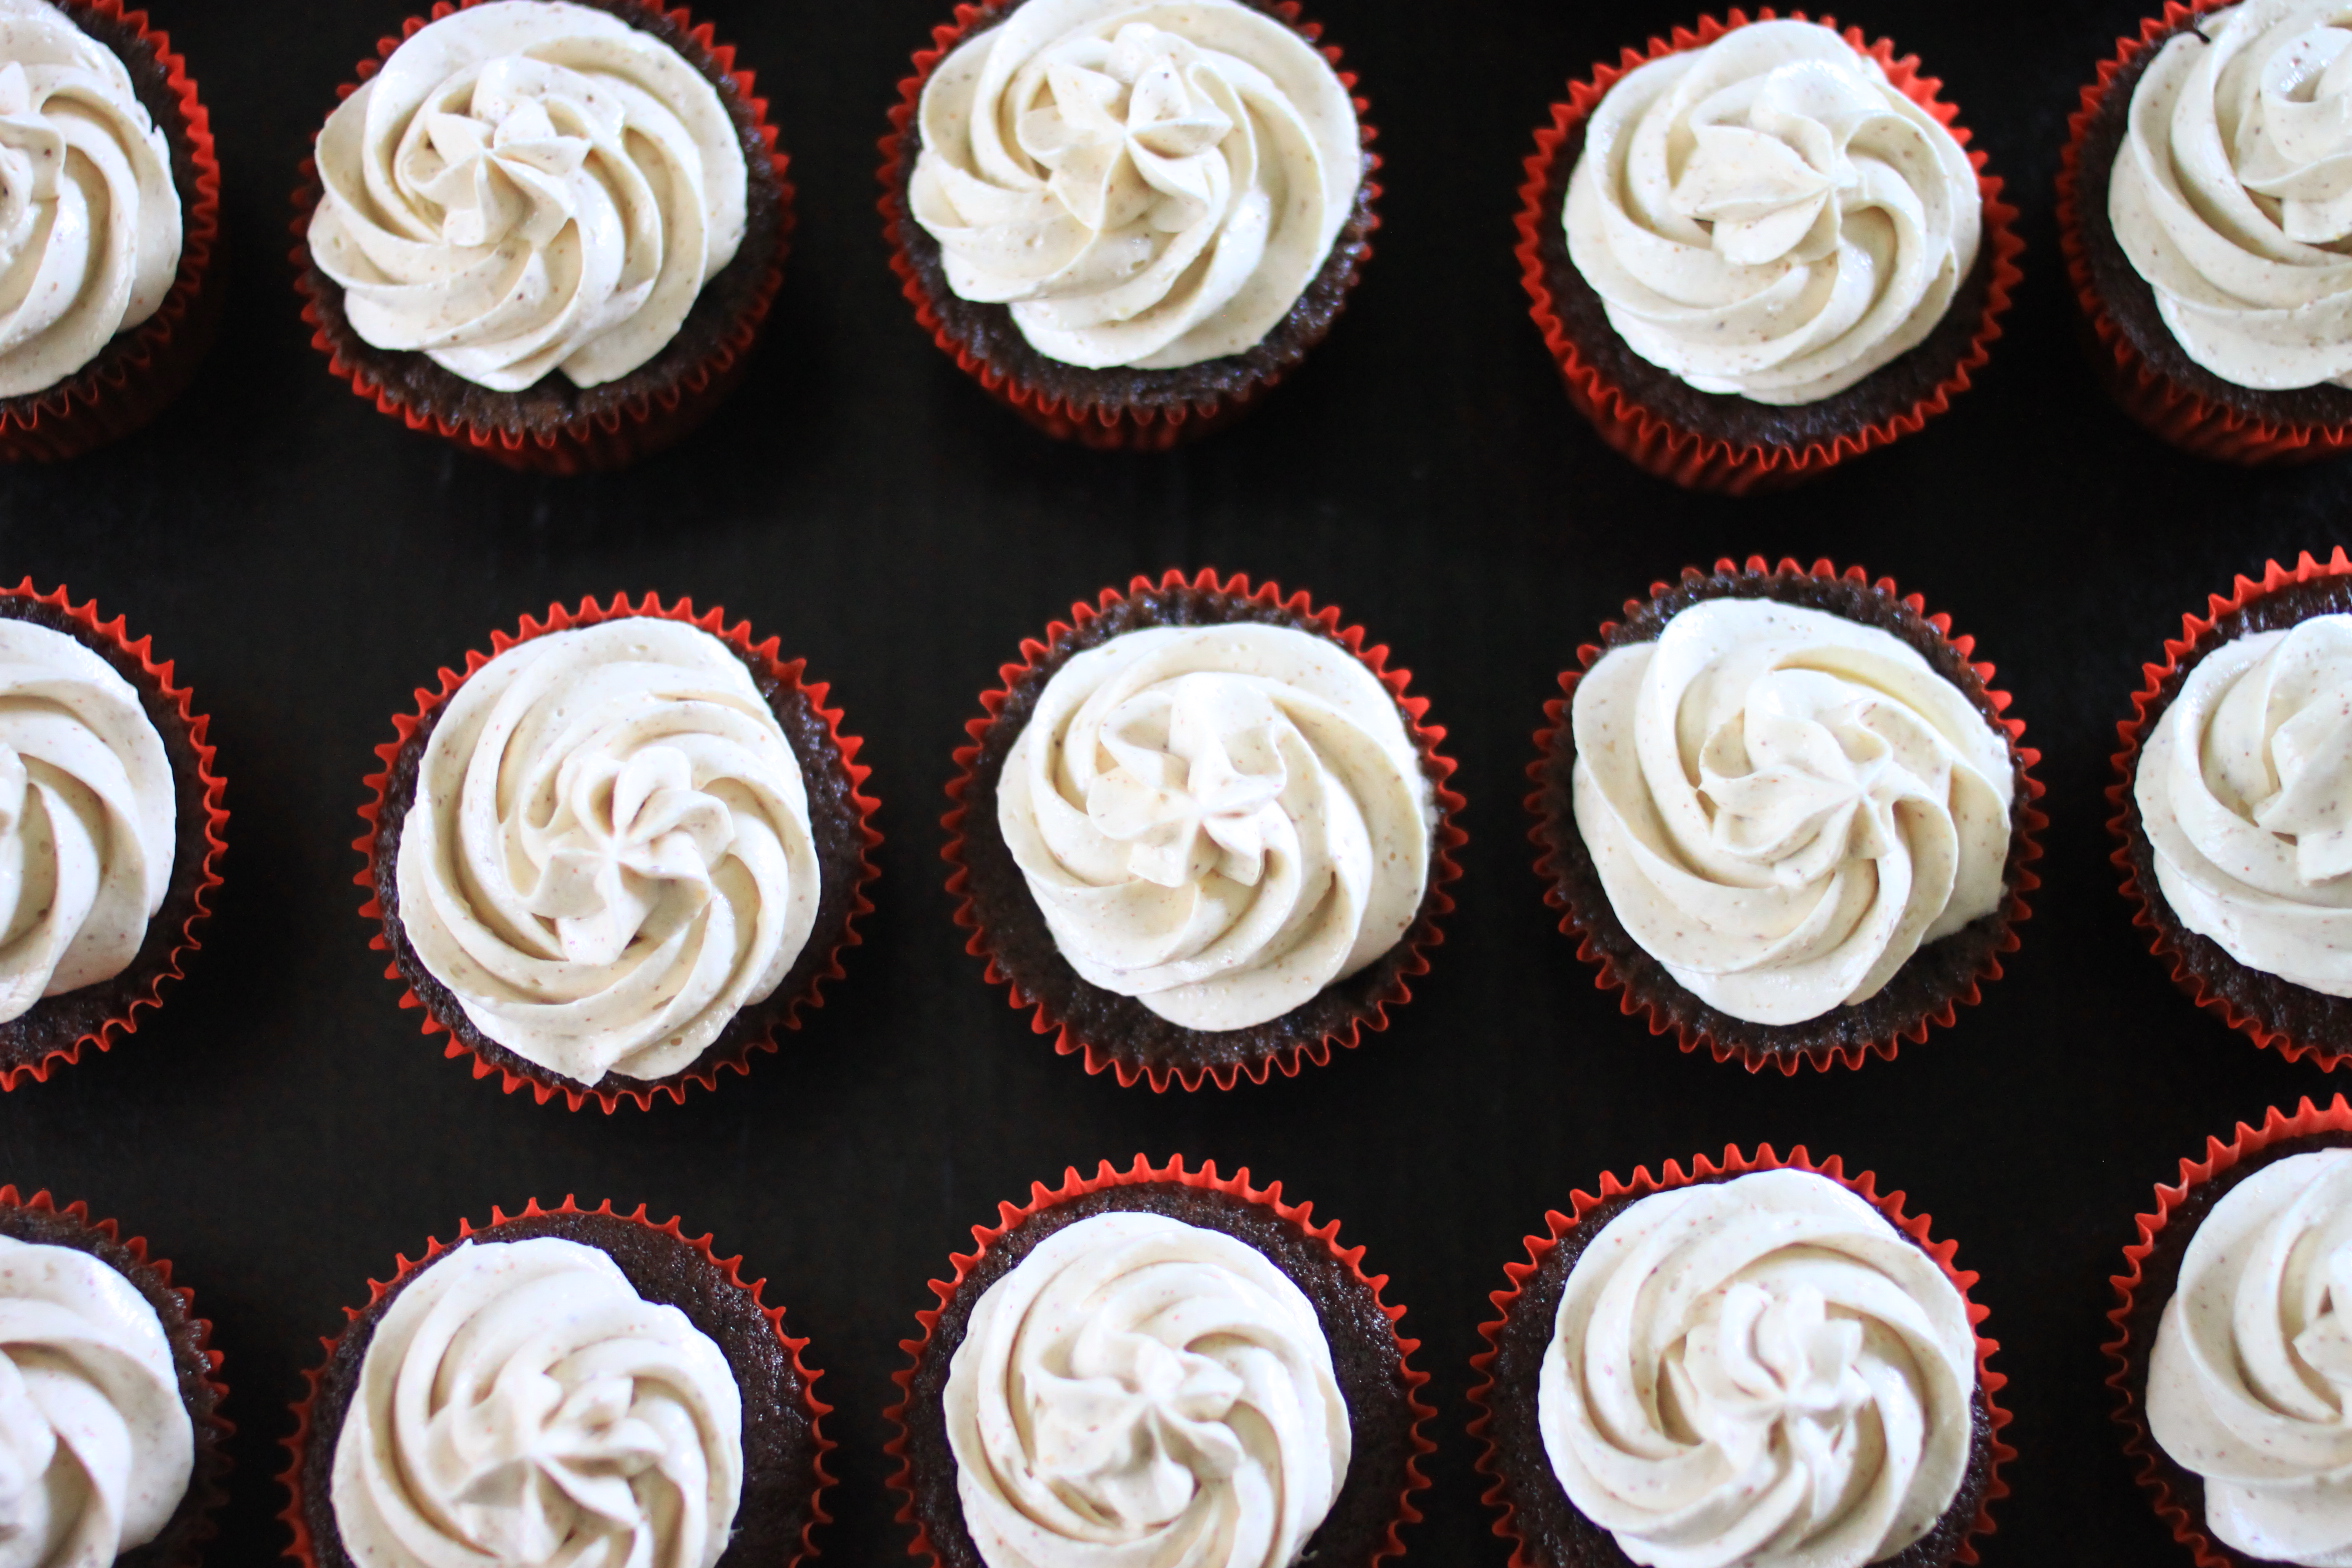
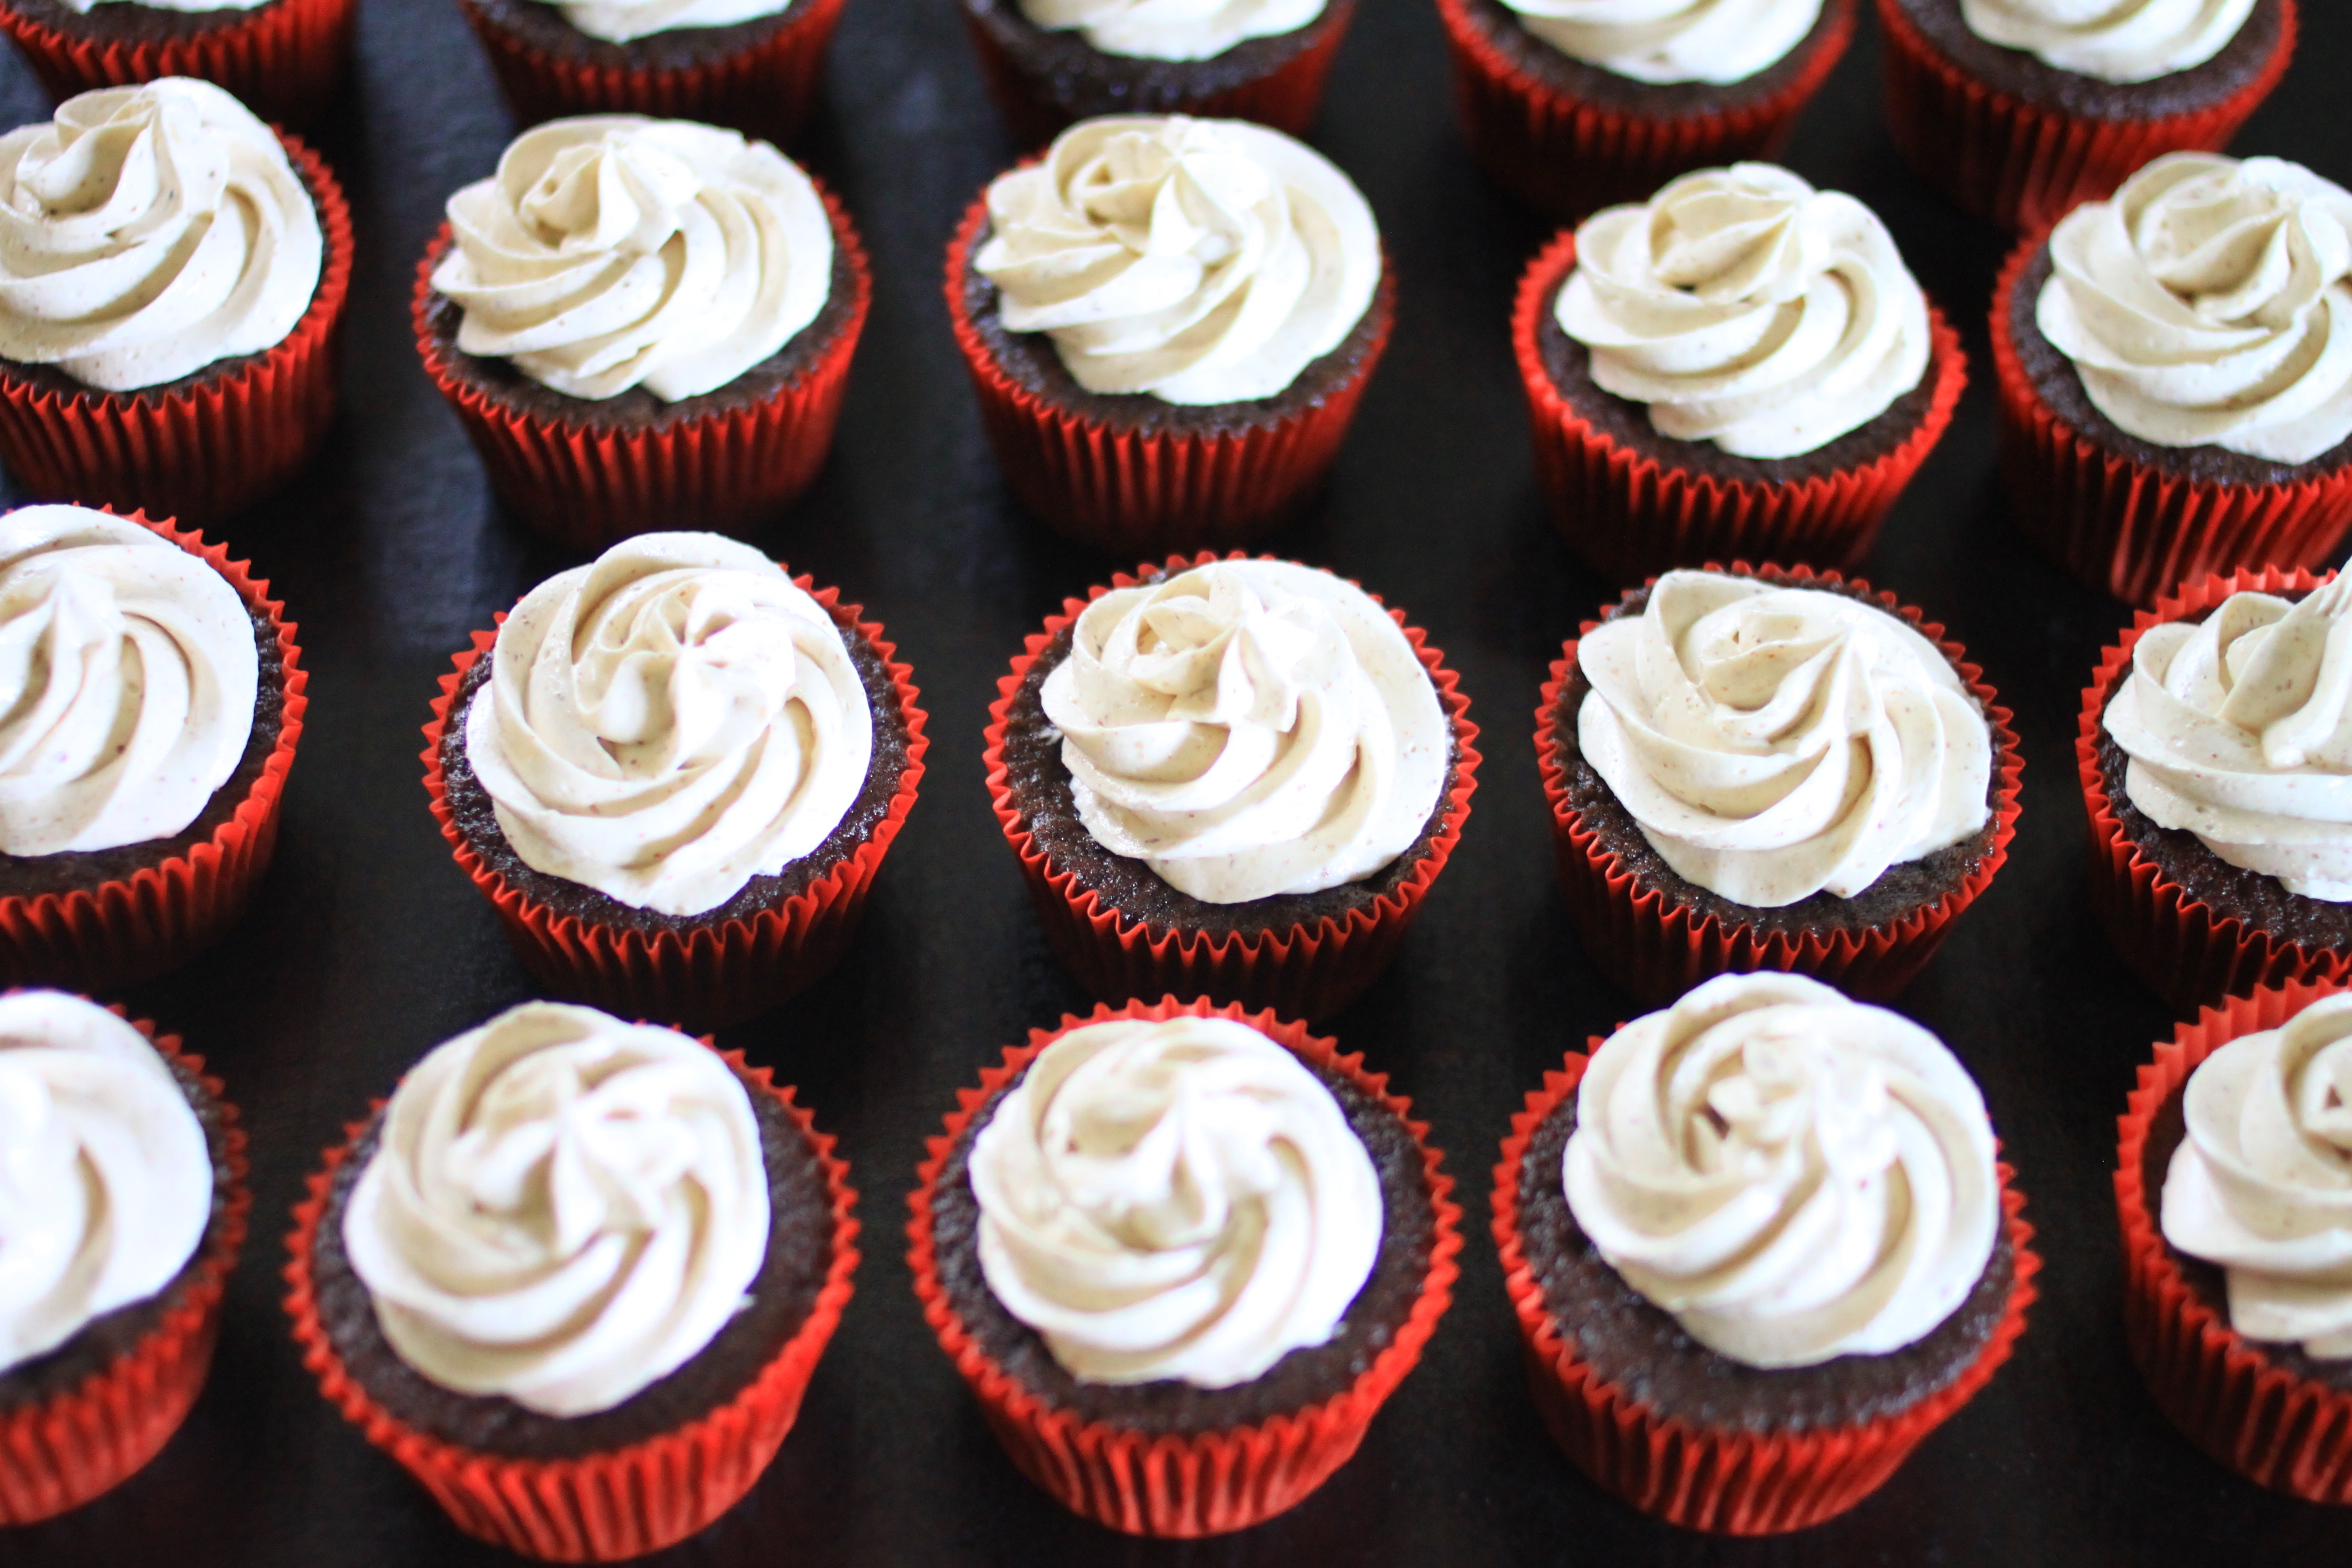
Silas’s school had a bake sale a few weeks ago wherein the third graders were doing a “cupcake walk” instead of the typical cake walk and they requested cupcake donations. I wanted to make a frosted cupcake that was both stable at room temperature and also wouldn’t immediately melt despite the warm temperatures. Swiss meringue seemed like the smartest frosting option, although I hadn’t ever made it in my life prior. Initially I wanted to make a chocolate cupcake with peanut butter frosting, but realized anything with peanuts probably wasn’t the ideal option in an elementary school that tries to be aware of peanut allergies in kids. Almond butter is generally received well around here so that was the substitution in this frosting. These cupcakes are airy and not overwhelmingly sweet, while the frosting is also decadent, rich, but light in consistency.

IMG_6337

Chocolate Cupcakes with Almond Butter Swiss Meringue

Yields approximately five dozen cupcakes

Ingredients:

For the cupcakes:
2½ cups packed brown sugar
¾ cup + 2 tbsp. butter, softened
3 eggs, room temperature
1¾ tsp. vanilla extract
2¼ cups all-purpose flour
½ cup + 2 tbsp. unsweetened cocoa
2½ tsp. baking soda
½ tsp. sea salt
1 cup sour cream, at room temperature
1 cup + 2 tbsp. boiling water

For the swiss meringue:
1 1/2 cups granulated sugar
6 egg whites
3 sticks unsalted butter, room temperature, cut into tablespoons
3/4 cup smooth peanut butter (the no-stir required type)
1 1/2 teaspoons vanilla extract

Directions:

Prepare the cupcakes: Preheat your oven to 350° F. Lightly grease or line standard muffin tins with paper liners.

In a large bowl, cream the butter and sugar until light and fluffy. Add the eggs to the creamed butter and sugar mixture, one at a time, making sure each is fully incorporated before adding the next. Beat on high speed until the mixture is light and fluffy. Mix in the vanilla extract.

In a separate bowl, combine the flour, cocoa powder, baking soda and salt. Alternate adding the flour mixture and the sour cream to your butter and sugar mixture. Mix on low speed until well combined. The batter will be semi-thick at this point.

IMG_2533

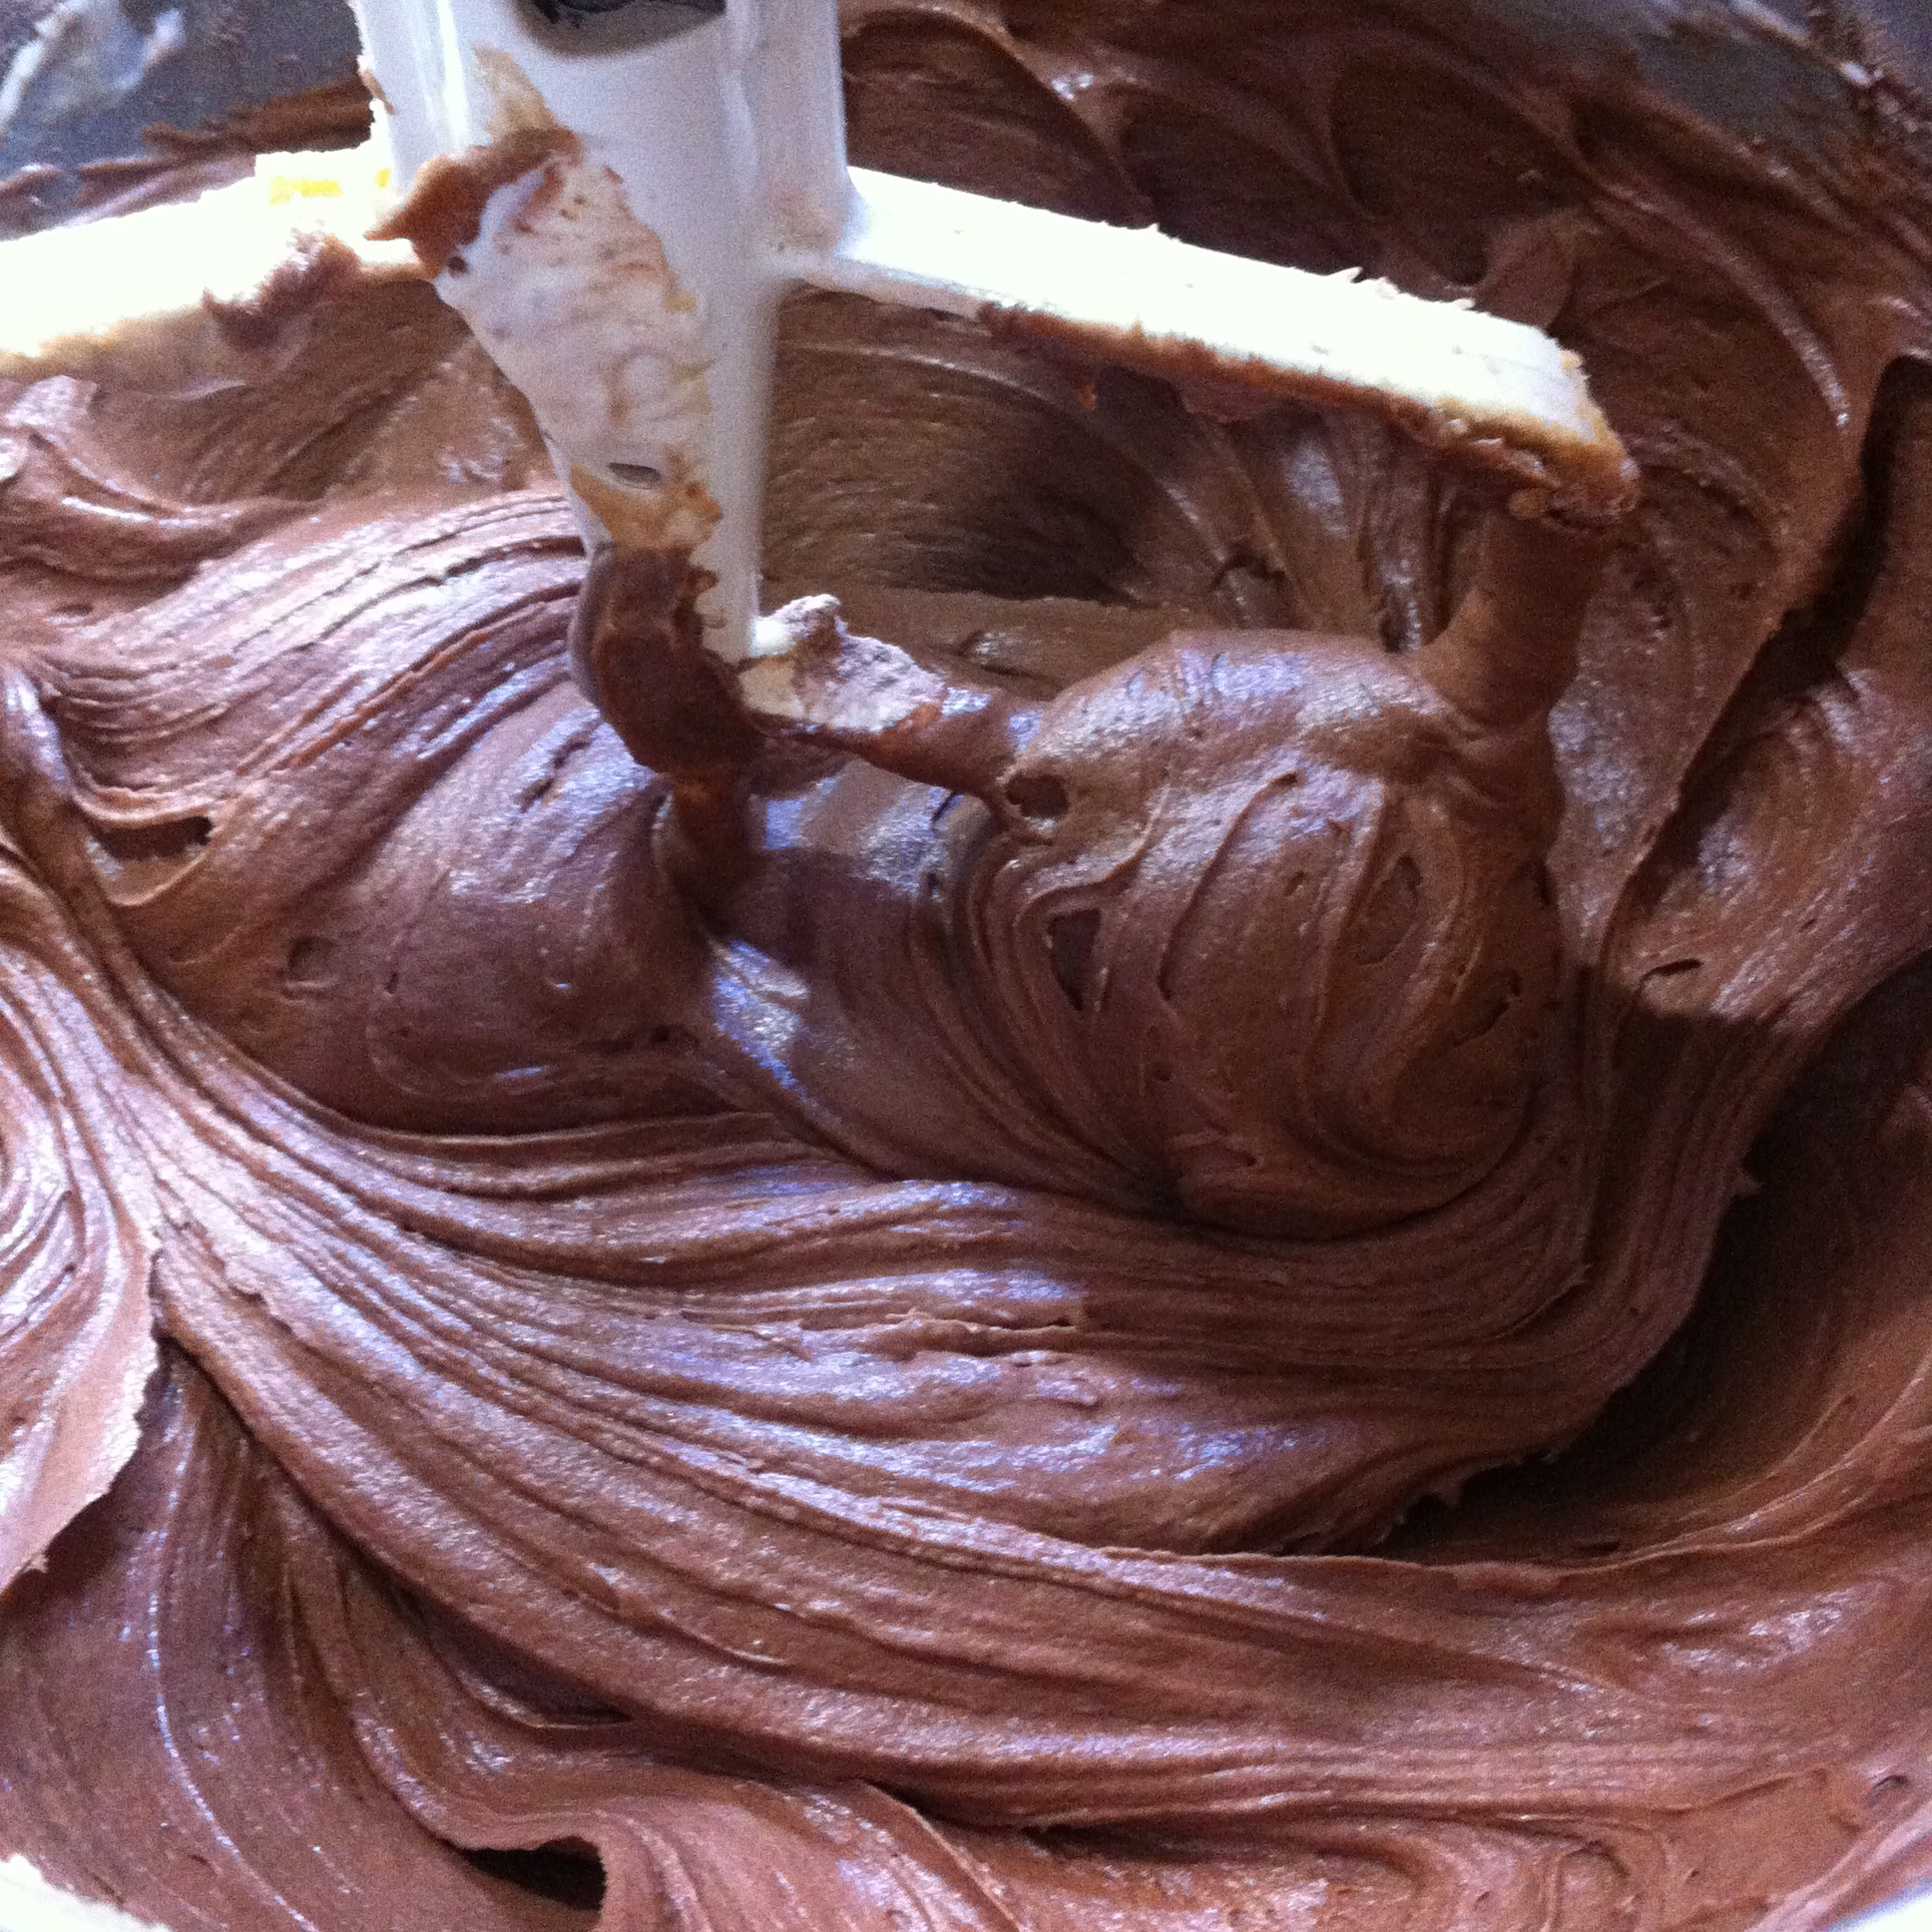
Stir the boiling water into the chocolate mixture. This will thin out the batter quite a bit. It’s all okay!

Fill each cupcake well about two-thirds full of batter then bake for 25 minutes or until a cake tester (i.e. toothpick!) inserted in the center comes out clean. Allow to cool in the pan for 10 minutes before removing to cool completely before frosting.

Prepare the swiss meringue and frost the cupcakes: 

Place the egg whites and sugar in a large metal or glass bowl. Set the bowl over a pot of just-simmering water (not boiling!), being careful that no water gets into the egg whites. Whisk, continuously, until the sugar has completely dissolved and the mixture looks opaque and the egg whites reach a core temperature of 160 degrees F.

Remove the bowl from the heat, add the vanilla, and whip on high speed until cooled to room temperature and stiff peaks form (10-12 straight minutes of whipping should do the trick).

IMG_6273

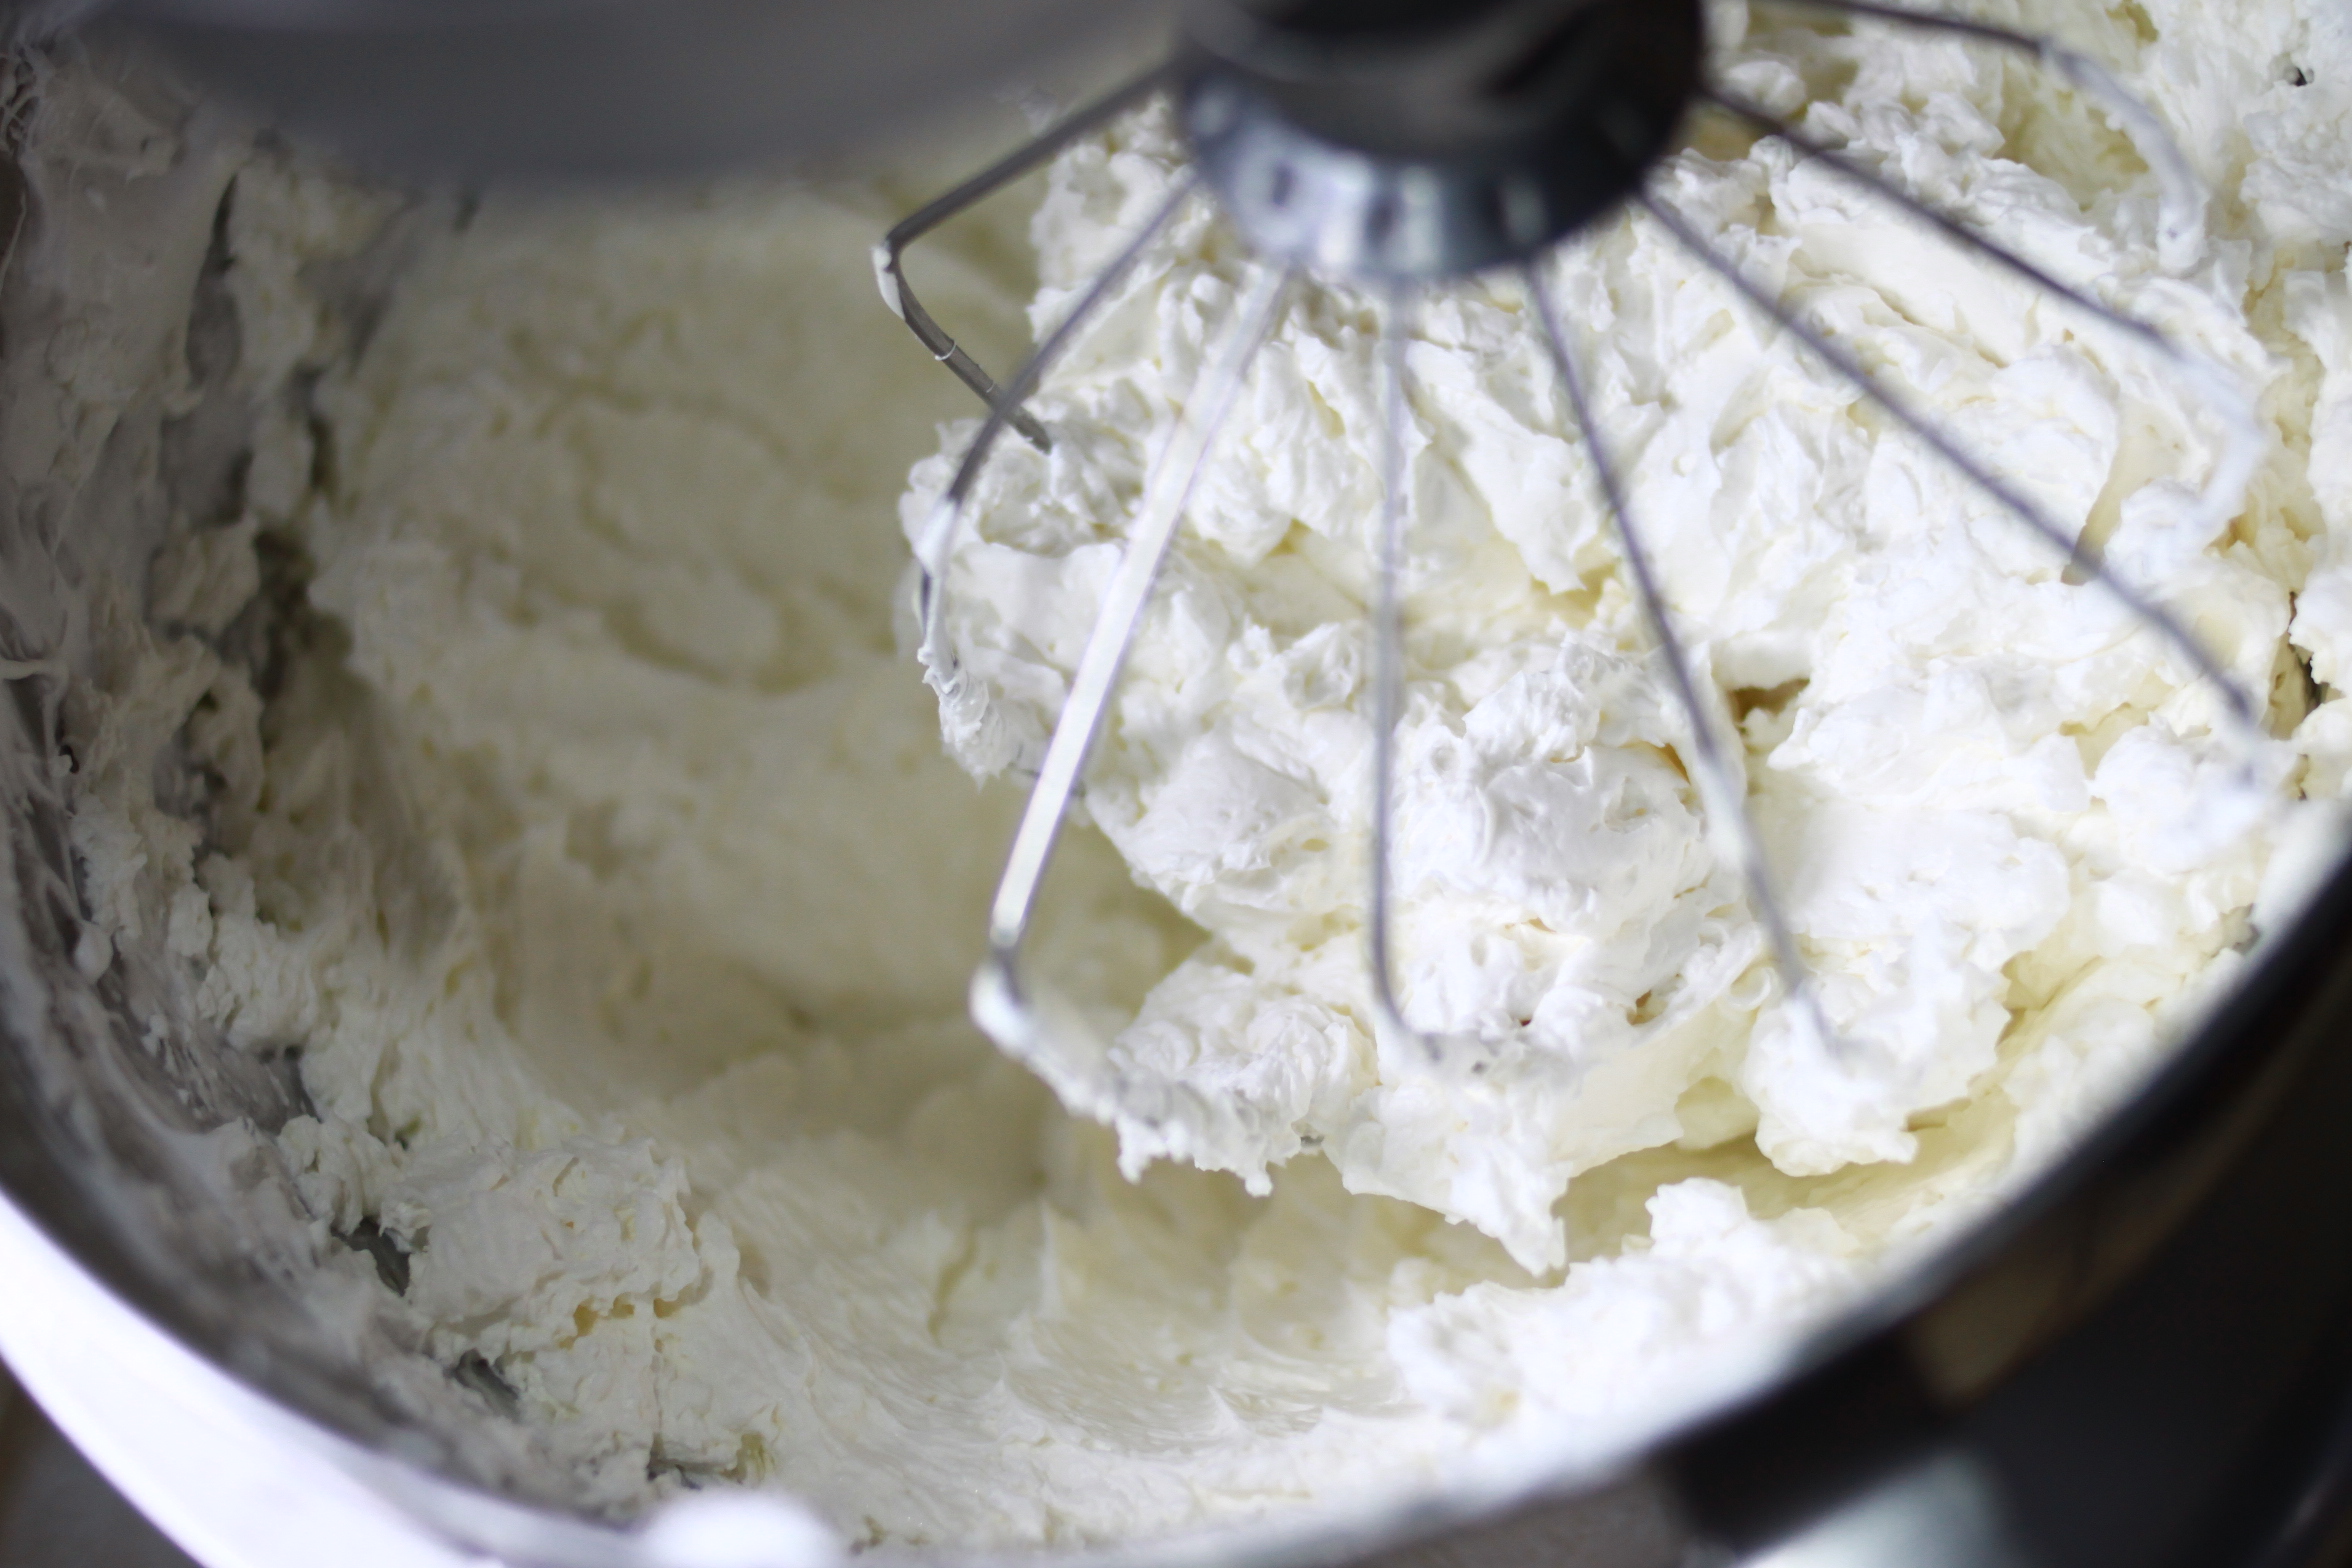
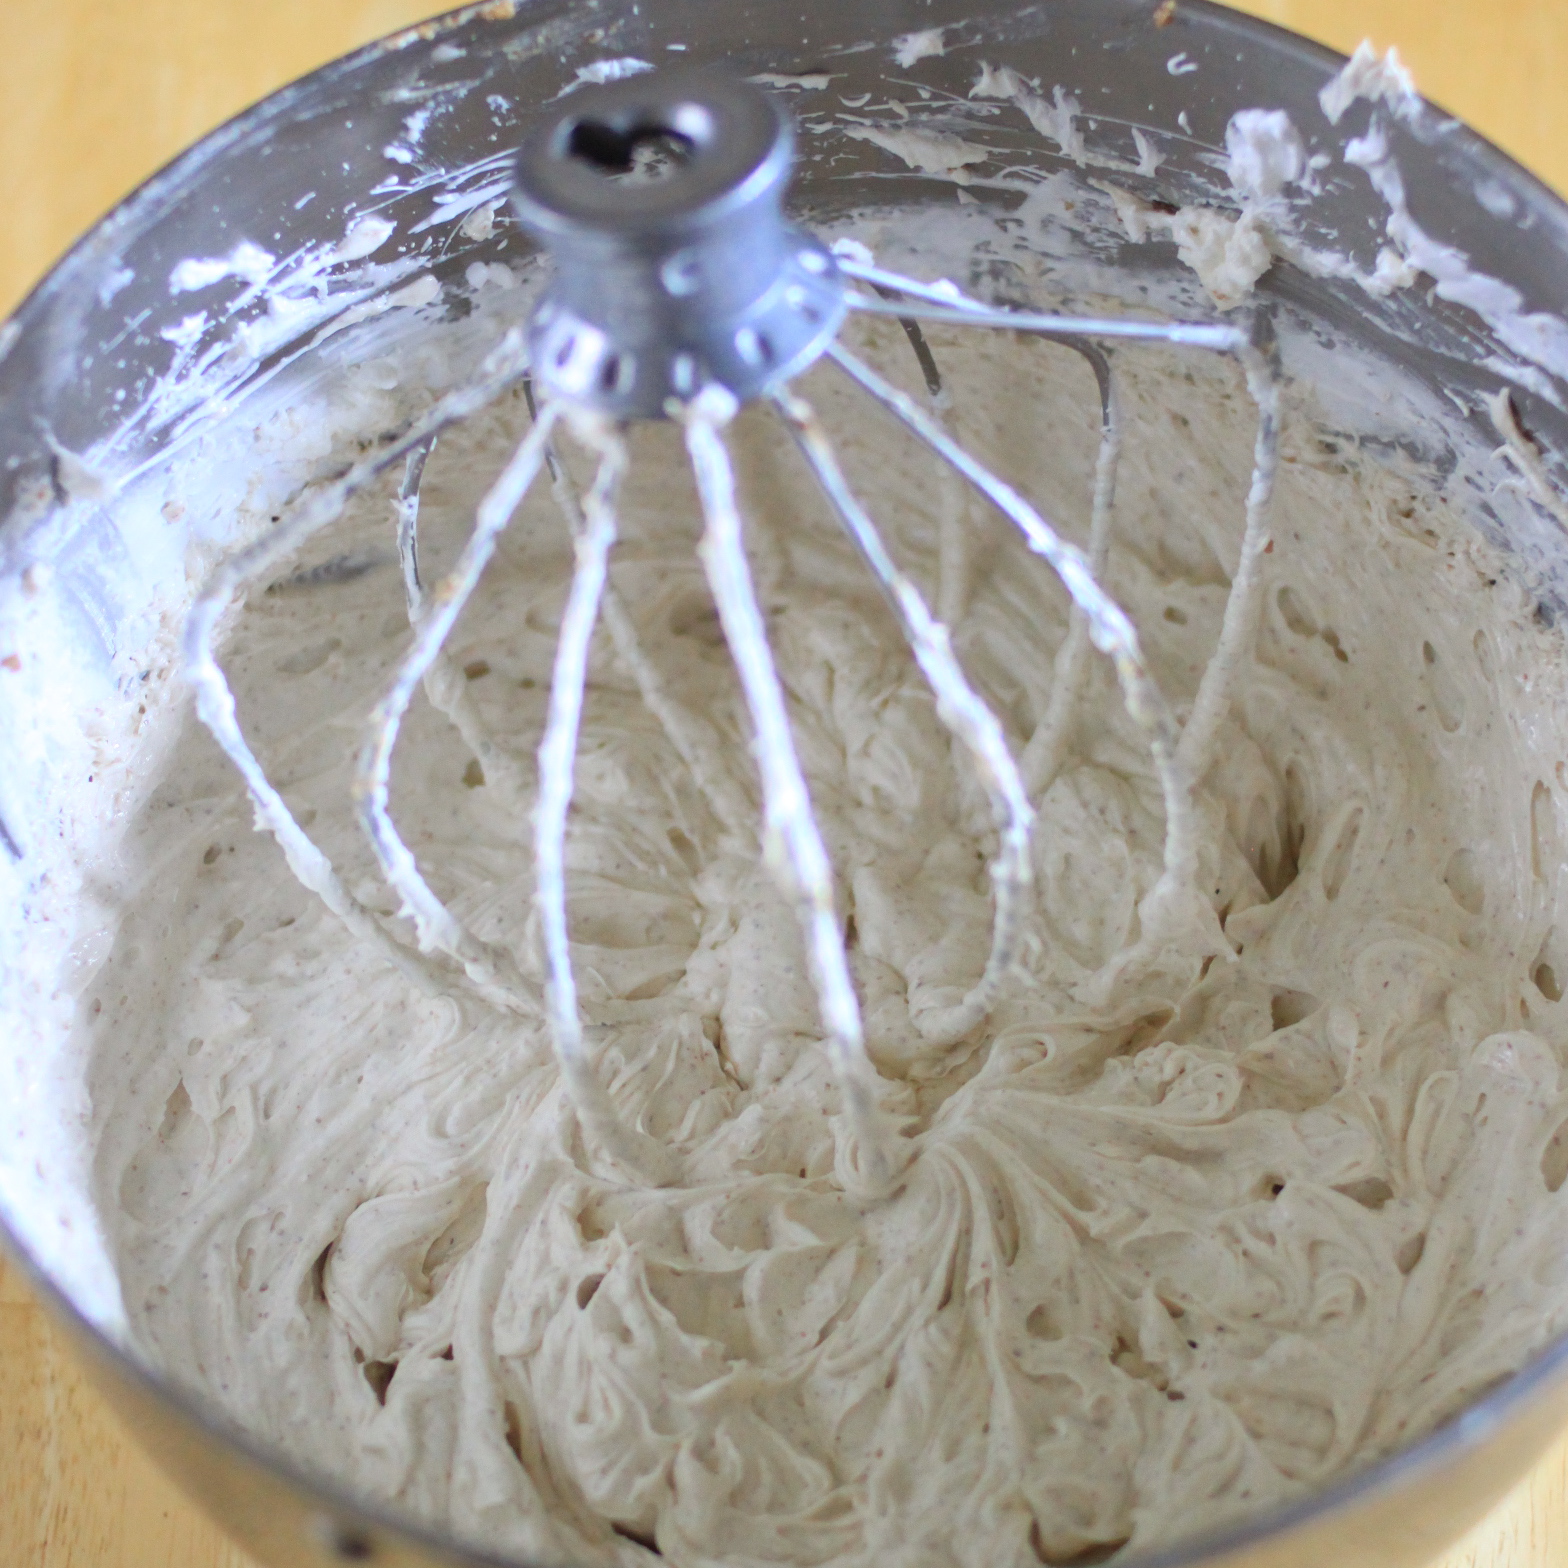
Add in the butter, a tablespoon at a time, mixing to incorporate after each addition. The mixture might appear clumpy and almost curdled looking at first—this is normal. Keep mixing and it will become even and smooth again.

After all of the butter has been mixed into the frosting, add in the peanut butter, whipping until completely combined.

IMG_6320

Generously spread the frosting on top of cupcakes, or use a large frosting tip to pipe the frosting onto your completely cooled cupcakes. Store the cupcakes covered at room temperature and enjoy within two days of preparing them.

IMG_6374

IMG_6366

Posted in Baking, Dessert, Kids, Snacks | Tagged , , , , , , , , , , , , | 1 Comment

Meatless Monday: Pesto Mushroom Pizza

IMG_8011

Today is my last day of being 28. Truth be told, it feels like one of those super non-monumental birthdays. 29: it’s not quite 30, but far enough from 21 that the need to overindulge feels unnecessary. I prefer a quiet celebration and always have. Last year I requested doughnuts and received a dozen. (I love good old fashioned fried, yeast-risen, glaze doughnuts.) This year, I haven’t requested much of anything and am entirely okay with that.

The thing is, I don’t feel like I need much of anything. Want? Sure, but non-monumental things, like the laundry to do itself and the dishes, even more so. I’d like sunshine and my body in a body of water. Preferably saltwater. A few cookbooks. My garden to miraculously start dumping out produce.

I would happily enjoy a day in the sunshine followed by bourbon on the rocks and good pizza. Really though, I look forward to no-frills low key hanging out with my husband on the day the kids are officially out of school for the summer. I told him to surprise me, but don’t feel like we need to do anything, because I am perfectly content with having a day where I don’t have anything to do. ;)

If I had to indulge in one particular pizza for my 29th birthday, it would be the following. While I am no pizza connoisseur, but I will tell you the following pizza crust is dynamite. It’s easy and tasty, crisp and soft simultaneously, and the current obsession in our home. And I’ll also be the first to tell you that when it comes to mushrooms of any sort, generally I am hesitant at best. Somehow though, when I first made this pizza, I was instantly enamored. Silas has been a fan all along, too, despite his declaration of “I don’t really like mushrooms.”

IMG_7871

Pesto Mushroom Pizza

Yields one 13×18-inch pizza

Ingredients:

For the dough:
2 cups plus 2 tablespoons all-purpose flour
1 1/4 teaspoons active dry yeast
1/4 teaspoon salt
1/4 teaspoon sugar
3/4 cup warm water
olive oil for pan

For the pizza:
5 fresh shiitake mushrooms, sliced into thin strips
1/4 pound oyster mushrooms, sliced into bite-size pieces
3 ounces pesto (fresh or store-bought)
8 ounces shredded mozzarella
2 tablespoons crumbled feta cheese
1/2 teaspoon sea salt
1/2 teaspoon granulated garlic
1/2 teaspoon fresh ground black pepper

IMG_7816

Directions:

Stir together the flour, yeast, salt and sugar in bowl. Add the water, then use a spoon or your hands to mix everything together until blended into a ball of dough (this should take no more than a few minutes).

Cover the dough and let it rise at room temperature for about 2 hours. It may be slightly less than doubled in size.

Once the dough has risen, preheat your oven to 500 degrees F. Generously oil a 13×18-inch pan with olive oil. Dump the dough onto a lightly floured surface. Generously oil a 13×18 inch rimmed baking sheet with a good quality olive oil. Gently place a ball of dough on the pan, stretching and pressing it out toward the edges. If it springs back wait five minutes and then continue. The dough is very thin. If it tears, simply pinch it back together.

Spread the pesto evenly over the dough. Arrange the sliced mushrooms around the pesto evenly. Sprinkle the top with the mozzarella, feta, salt, garlic, and pepper. Bake for 18-20 minutes until the edges are slightly charred. Let the pizza cool for 5 minutes, then cut into 12 squares. Serve immediately or at room temperature.

IMG_8034

IMG_7885

IMG_7993

IMG_7810

Posted in Dinner, Lunch, Meatless Monday, Snacks, Vegetarian | Tagged , , , , , , , , , , | Leave a comment

Day to Day Life: Week Twenty-Three

A look at the last week:

IMG_3156

‘Tis the season!

IMG_3161

Since it’s also strawberry season, I made some jams this week.

IMG_3145

Early in the week, Mama Bird surprised me by letting me pet her…

IMG_3127

Tofu and veggies in peanut sauce with veggie egg rolls one night.

IMG_3195

These two like watching me water the gardens in the evening.

IMG_3323

Early morning hideout.

IMG_3319

Brunch for one: black coffee and sourdough toast topped with leftover guacamole and eggs.

IMG_3322

Our garden is happily dishing out some snap peas, broccoli, baby lettuces, herbs, zucchini, summer squash, and the promise of tomatoes, beets, beans, and eggplant to come.

IMG_3234

A from-the-garden salad embellished with red bell peppers and fresh raw sweet corn.

IMG_3248

An old friend is one of the editors for Camas – an Environmental Studies publication at the University of Montana. I got an email a couple months ago asking if I’d like to submit some poetry or photography to an upcoming edition. I was fortunate enough to have one of my photos included and printed alongside the featured story and absolutely stoked to receive my contributor’s copy this week.

IMG_7854

As per the weekly schedule around here… pizza.

IMG_3324

And I’ve totally mastered making vegetarian pepperoni more appetizing and spicy.

IMG_8447

“BRAAAAINS… I want braaaains…”

IMG_3320

Mashed ‘taters, fried chicken tofu, vegetarian gravy, and veggies.

IMG_8071

Mama Bird’s eggs both hatched this week! 18 days after being laid — the predictable incubation time of feral pigeons. I didn’t know that parent pigeons remove the eggshells from their nest once the babies hatch! As I was watering our front yard the evening these babies hatched, I found the eggshells dropped near our roses.

[wpvideo FaOSVhfu]

Watching these little baby birds cracks me up. Few things are better than watching a baby-bobble-head-bird… Hehe.

IMG_3325

A ridiculously high-piled sammich for the panini maker for one hungry 15 year old.

IMG_8404

The dudes.

IMG_8679

Silas’s Little League team, who won first place in the league for the regular season, played their last tournament game yesterday. Unfortunately they lost 8-3 in a tough game, coming in second for the season.

IMG_3318

Lastly, a muffin experiment made of buttermilk, fresh raspberries, and fresh peaches!

Posted in Day to Day, Photography | Tagged , , , , , , , , , | Leave a comment

Strawberry Brown Sugar Vanilla Bean Shortcake

photo 4

Nothing screams late spring and early summer like fresh strawberries around here. They’re everywhere. In gardens, in the grocery stores, at the farmer’s markets… And I love their relatively inexpensive abundance!

Growing up, my mom occasionally made strawberry shortcake for dessert. This often included Bisquik biscuits topped with hand cut and sugar-soaked berries. It was a serve-yourself kind of ordeal. My dad’s technique for eating strawberry shortcake is much more appealing to me now that I’m nearing 30 and not some snotty little kid. He’d crumble up his biscuit into a bowl, top it with a spoonful of strawberries my mom had allowed to sit in sugar for hours, then poured 2% milk over the top and ate it like thick mushy cereal.

I couldn’t tell you the last time I opened a box of Bisquik, as homemade biscuits are not difficult to make. Instead, I tweaked my go-to biscuit recipe into something semi-sweet and dessert like. This dough not only tastes lovely, its vanilla-bean and brown sugar laced self is intoxicatingly fragrant, too. I do enjoy eating my soppy strawberry shortcake, although I like to use vanilla almond or coconut milk and indulgently stir in a spoonful of whipped cream, too!

Feel free to assemble these however you’re inclined!

photo 5

Strawberry Brown Sugar Vanilla Bean Shortcake

Yields 8 servings.

Ingredients:

1 1/2 pounds fresh strawberries, hulled then quartered
3 tablespoons light brown sugar
1 teaspoon pure vanilla extract

3 cups all purpose flour
1/3 cup packed light brown sugar
1 vanilla bean, scraped
4 1/2 teaspoons baking powder
1/2 teaspoon salt
3/4 teaspoon cream of tartar
6 tablespoons unsalted butter, cold
6 tablespoons vegetable shortening
1 egg, beaten
3/4 cup buttermilk, chilled
3 tablespoons buttermilk or heavy cream
3 tablespoons light brown sugar

1 cup heavy cream
1 tablespoon granulated sugar
1/2 teaspoon vanilla extract

photo 1

Directions:
Prepare the strawberries: Place the quartered strawberries in a bowl. Add the sugar and vanilla, stirring until combined. Cover and refrigerate for at least an hour, up to 8 hours in advance.

photo 2

Prepare the shortcakes: Preheat your oven to 425 degrees F and line a large baking sheet with parchment paper. In a large mixing bowl, combine the flour, 1/3 cup brown sugar, scraped insides from the vanilla bean, baking powder, salt and cream of tartar until well mixed. Cut in the butter and shortening, until the mixture resembles very coarse crumbs. Whisk the egg into the buttermilk, then pour the mixture into your dry ingredients, working quickly to stir together a soft dough.

Turn the dough out onto a lightly floured surface, quickly but gently kneading about 10 times. Roll the dough out to into a rectangle that is about 12″ by 6.5″. Fold one side of the dough towards the center, then fold the opposite side towards the center. (You’ll have 3 layers.) It’s okay if the dough crumbles a bit, just push it back together. Roll the rectangle to about 1″ thick. Cut the dough into 8 even sized squares. Place on your prepared baking sheets and brush each top with the buttermilk of heavy cream, followed by a light sprinkling of brown sugar. Bake for 12-15 minutes, until lightly golden on top and cooked all the way through.

photo 2

Prepare the whipped cream for serving: Pour the cream, sugar, and vanilla into a bowl and whisk on high speed until medium peaks form, about 2-3 minutes.

Assemble shortcakes: Split a biscuit/shortcake in half. On the bottom, add a spoonful of strawberries, followed by some whipped cream. Top with the other biscuit/shortcake. Add more berries and whipped cream on top to your liking. Devour immediately.

photo 1

Posted in Baking, Breakfast, Dessert, Kids, Snacks, Vegetarian | Tagged , , , , , , , , | Leave a comment

Meatless Monday : Creamy Sweet Corn Risotto

photo 4

If you have never had fresh sweet corn, raw, please get on that right now. Sweet white corn has begun showing up in our local grocery stores and I couldn’t be more excited. A couple things tell me we’re heading into summer, including the abundance of strawberries and ears of corn. Woo hoo! (Of course there are numerous other things, like the fact that we’re in June — WHOA where’d the last few months go?! — or perhaps the way school’s winding down, there are more warm sunny days than not each week, etc. — You get my point.)

I decided to use fresh sweet corn in the following risotto, as I thought the sweetness would balance nicely with the creaminess of the dish.  I made a corn-infused broth to add another layer of corn-flavor throughout the dish. Though creamy and rich, this corn risotto isn’t overly heavy. A delight for an easy dinner this time of year!

photo 2

Creamy Sweet Corn Risotto

Serves 6-8 folks.

Ingredients:
4 large ears of fresh sweet corn (approximately 3 to 3 1/2 cups of kernels)
7 1/2 cups No-Chicken or vegetable broth
2 cups risotto / Arborio rice
1 large shallot, peeled and minced
4 cloves garlic, minced
4 tablespoons butter
2 tablespoons olive oil
3/4 cup dry white wine (a sauvignon blanc works nicely)
4 ounces mascarpone
1/4 cup grated parmesan
2 tablespoons fresh thyme, chopped
salt and pepper

photo 1

Directions:

Prepare the corn: Shuck the corn, removing as much of the silk as you can. Cut off the stem. Place the ear of corn, cut side down while holding it near the top of the ear. Use a sharp knife to start at the top, cutting downward with a gentle sawing motion, cutting corn from the cob at about two-thirds the depth of the kernels. Continue cutting until all of the corn is removed. Reserve the cobs as we will need them for our broth. Set the cut kernels aside until needed.

Warm the broth: Pour all of the No-Chicken or vegetable broth into a large stock pot. Add all of the corn cobs that have had the kernels removed, into the stock. Bring up to simmer over medium heat, then reduce heat to low and allow the broth to simmer for 30 minutes. Keep on low heat after the 30 minutes pass.

Prepare the risotto: In a large heavy-bottomed pot or pan (similar to this one), heat the oil and butter over medium-high heat, until the butter fully melts. Add the shallot and garlic, then saute until tender and almost translucent — about 5 minutes.

Add rice, and stir until grains are translucent at their edges but still opaque in the center, about 3 minutes. Add the wine, stirring until the liquid is almost completely absorbed. Add the warm stock by the cupful, stirring until rice has absorbed nearly all of the liquid before adding the next cup, until all of the broth has been incorporated.

The risotto should be creamy and tender. Stir in the mascarpone, parmesan, and fresh thyme until everything is combined. Stir in the freshly shucked corn kernels. Taste, then add salt and pepper to your liking.

photo 3

photo 2

Posted in Dinner, Lunch, Meatless Monday, Vegetarian | Tagged | 3 Comments