Bean and Cheese Pupusas

While driving home from Portland, down I-5 about a year and a half ago in torrential rain, we stopped in a little town called Wolf Creek (about an hour north of Ashland). Initially we stopped for gas. However, that’s not why we decide to stop there anymore.

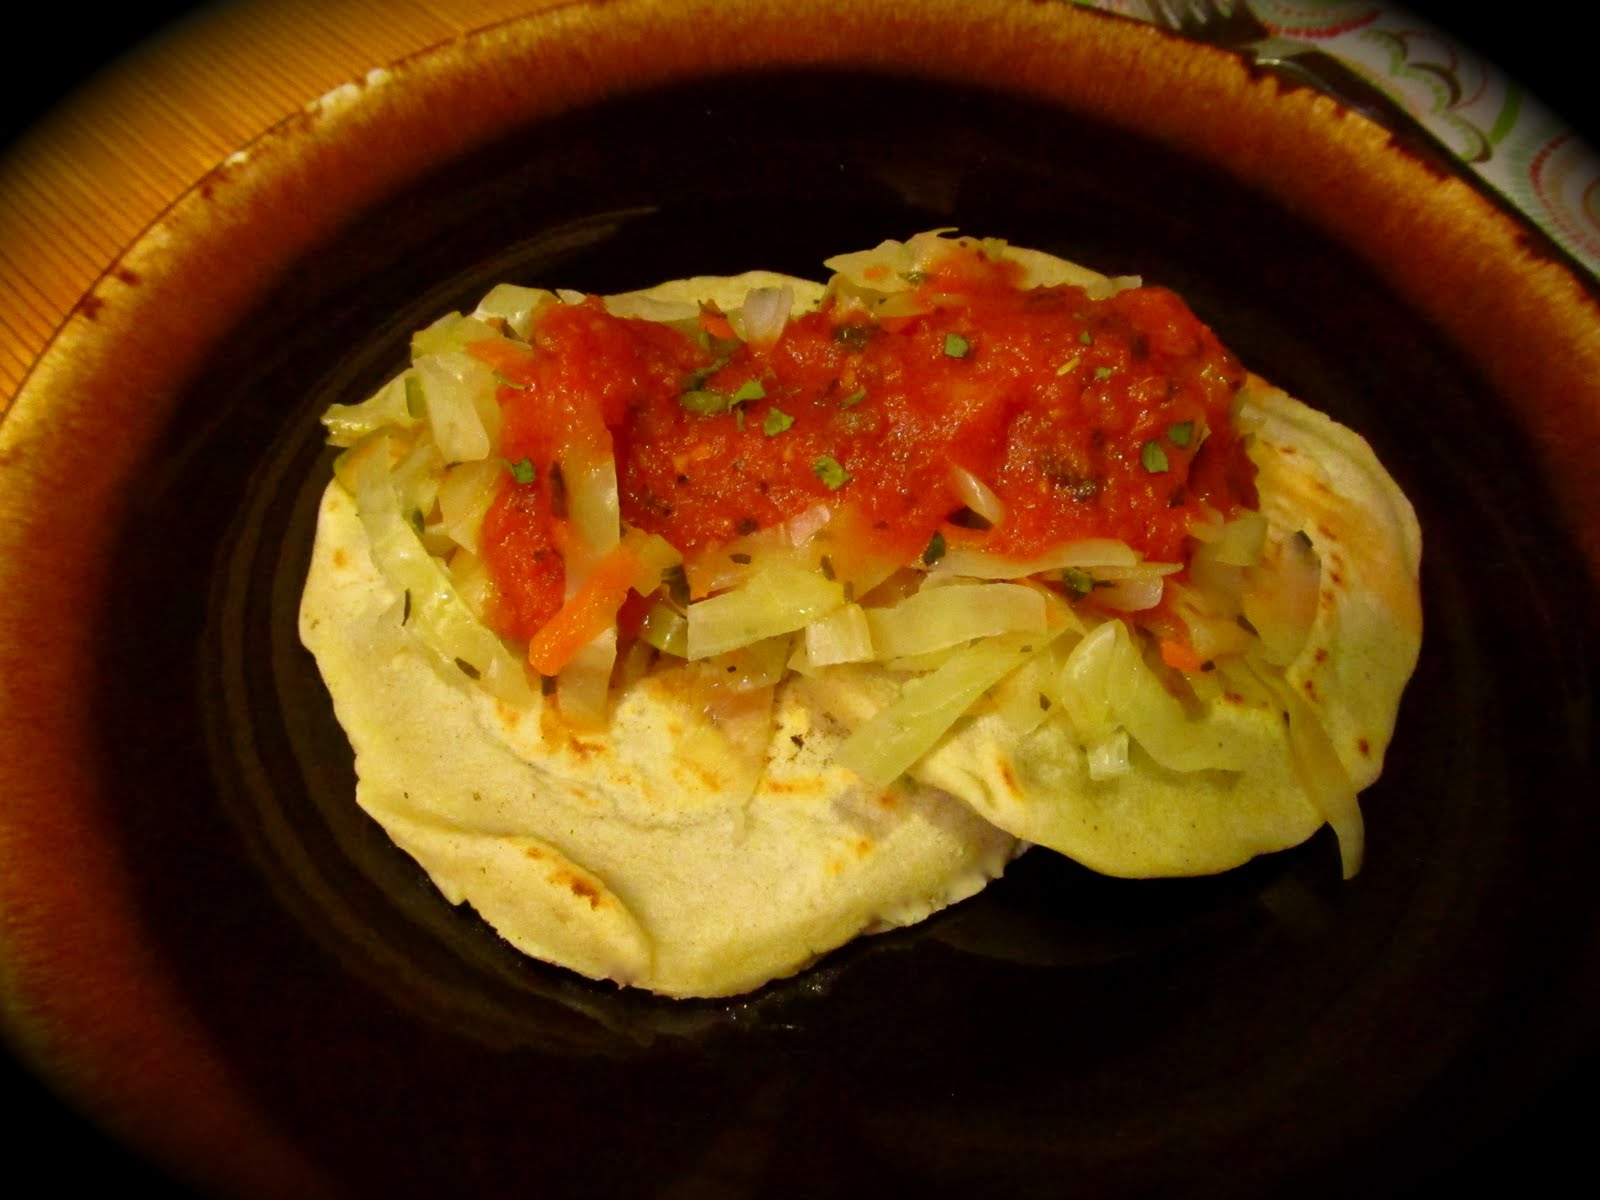
Across from the gas station, we noticed a food truck labeled “Lety Pupusa – TACOS Burritos y Pupusas.” I had no idea what a pupusa was, but the thick disc of corn masa on my plate, filled with the creamiest refried beans and melted cheese, topped with a cabbage slaw heavy with the taste of oregano, and a mysteriously un-spicy red salsa was amazing. I decided then that I could eat bean and cheese pupusas every day. Happily.

Of course I came home wanting to learn more about this delicious concoction I’d just had and wanted more of. Pupusas are El Salvadorian and essentially a thick tortilla stuffed with beans, cheese, or meat of your choosing. They’re served with a cabbage-based slaw called curtido, and a red sauce, salsa roja that lacks spice, but is delicious nonetheless.

The mister and I recently discovered a Pupuseria in Oakland, CA. that was deliriously good. We will certainly be back… Plus, for less than $10 we both left completely filled and more than happy with our meal!

That said, I’ve made pupusas at home a couple times (as an hour drive north or 5½ hours south is a little too demanding just to get my pupusa-fill). While there are a few separate recipes here, the actual task of making these delicious treats isn’t as difficult as it sounds.

Try it. You won’t be disappointed!

Bean and Cheese Pupusas

For the Curtido:

Ingredients:
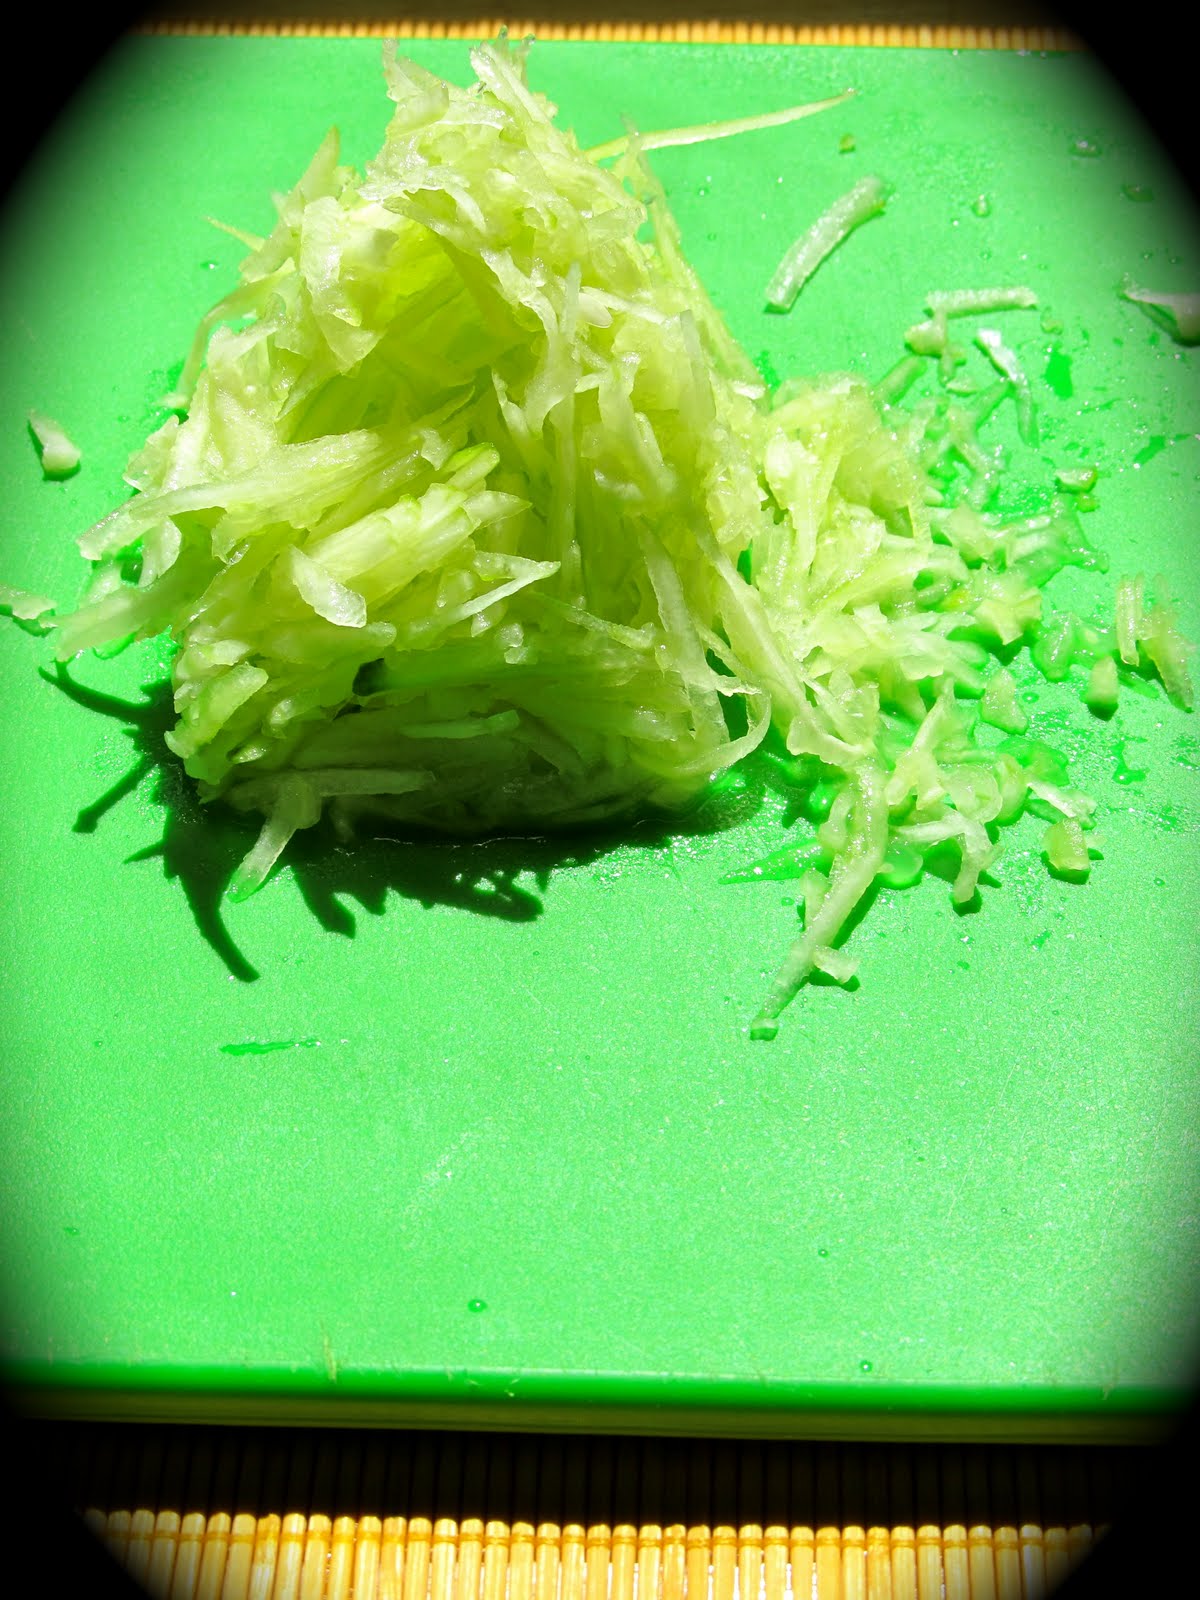
½ small head of cabbage, sliced thinly
1 medium carrot, peeled and grated
¼ cup onion, thinly sliced
1 small jalapeño, seeded and diced
1 cup white distilled vinegar
½ cup water
3 tbsp. sugar
2 tsp. dried oregano
¼ tsp. red chili pepper flakes
2 quarts water

Directions:
Bring the 2 quarts of water to a rolling boil.

Meanwhile, combine the cabbage, carrot, and onion in a large bowl and toss to mix. Pour the boiling water over this mixture. Allow the vegetables to sit for 5-10 minutes in the hot water.

Drain the cabbage mixture, making sure to squeeze out as much access liquid as possible. Add the jalapeño, sugar, oregano, and chili flakes. Toss together.

Pour the vinegar and water over the mixture and toss to combine. Cover with plastic wrap and allow the curtido to sit for at least 2 hours in the refrigerator(the longer you wait, the better it’ll be!).

Bring the curtido back to room temperature before serving.

For the Salsa Roja: Red Sauce

Ingredients:
2 cups diced, peeled tomatoes
½ onion, diced
3 cloves garlic, diced
1 small jalapeño, seeded and diced
½ tsp. dried oregano
1½ tsp. olive oil
¼ tsp. red chili flakes
salt and pepper to taste

Directions:
Heat the oil over medium-high heat. Sauté the onion and garlic, until onions are slightly translucent. Add in the tomatoes, jalapeño, oregano, and chili flakes. Allow the mixture to come to a low boil, for 1-2 minutes.

Pour the mixture into a high-power blender or food processor fitted with the large chopping blade. Blend until the contents are completely smooth. You may need to add some water to thin out the salsa (it won’t thicken upon cooling, so only add as much liquid as you prefer, avoiding an overly watery sauce). Add your salt and pepper to your liking.

Refrigerate until needed.

For the Bean Filling:

Ingredients:
1½ cups dried pinto beans, soaked overnight
1 tsp. sea salt
1 tsp. ground black pepper
½ tsp. ground cumin
½ an onion, cut into large chunks
2 cloves garlic
water
2 tbsp. unsalted butter

Directions:
Place the beans, salt, pepper, cumin, onion, and garlic in a large pot. Fill the pot with water at least 3-4 inches above the beans. Bring to a low boil then cover and allow the beans to cook until they’re tender (1½ – 2 hours or so).

Strain the cooked beans, making sure to reserve at least a ½ cup of cooking liquid. Use a potato-masher to mash beans. Add in the butter and continue mashing, until you reach a paste-like consistency. Add cooking liquid one tablespoon at a time, until the beans reach a thick, smooth consistency.
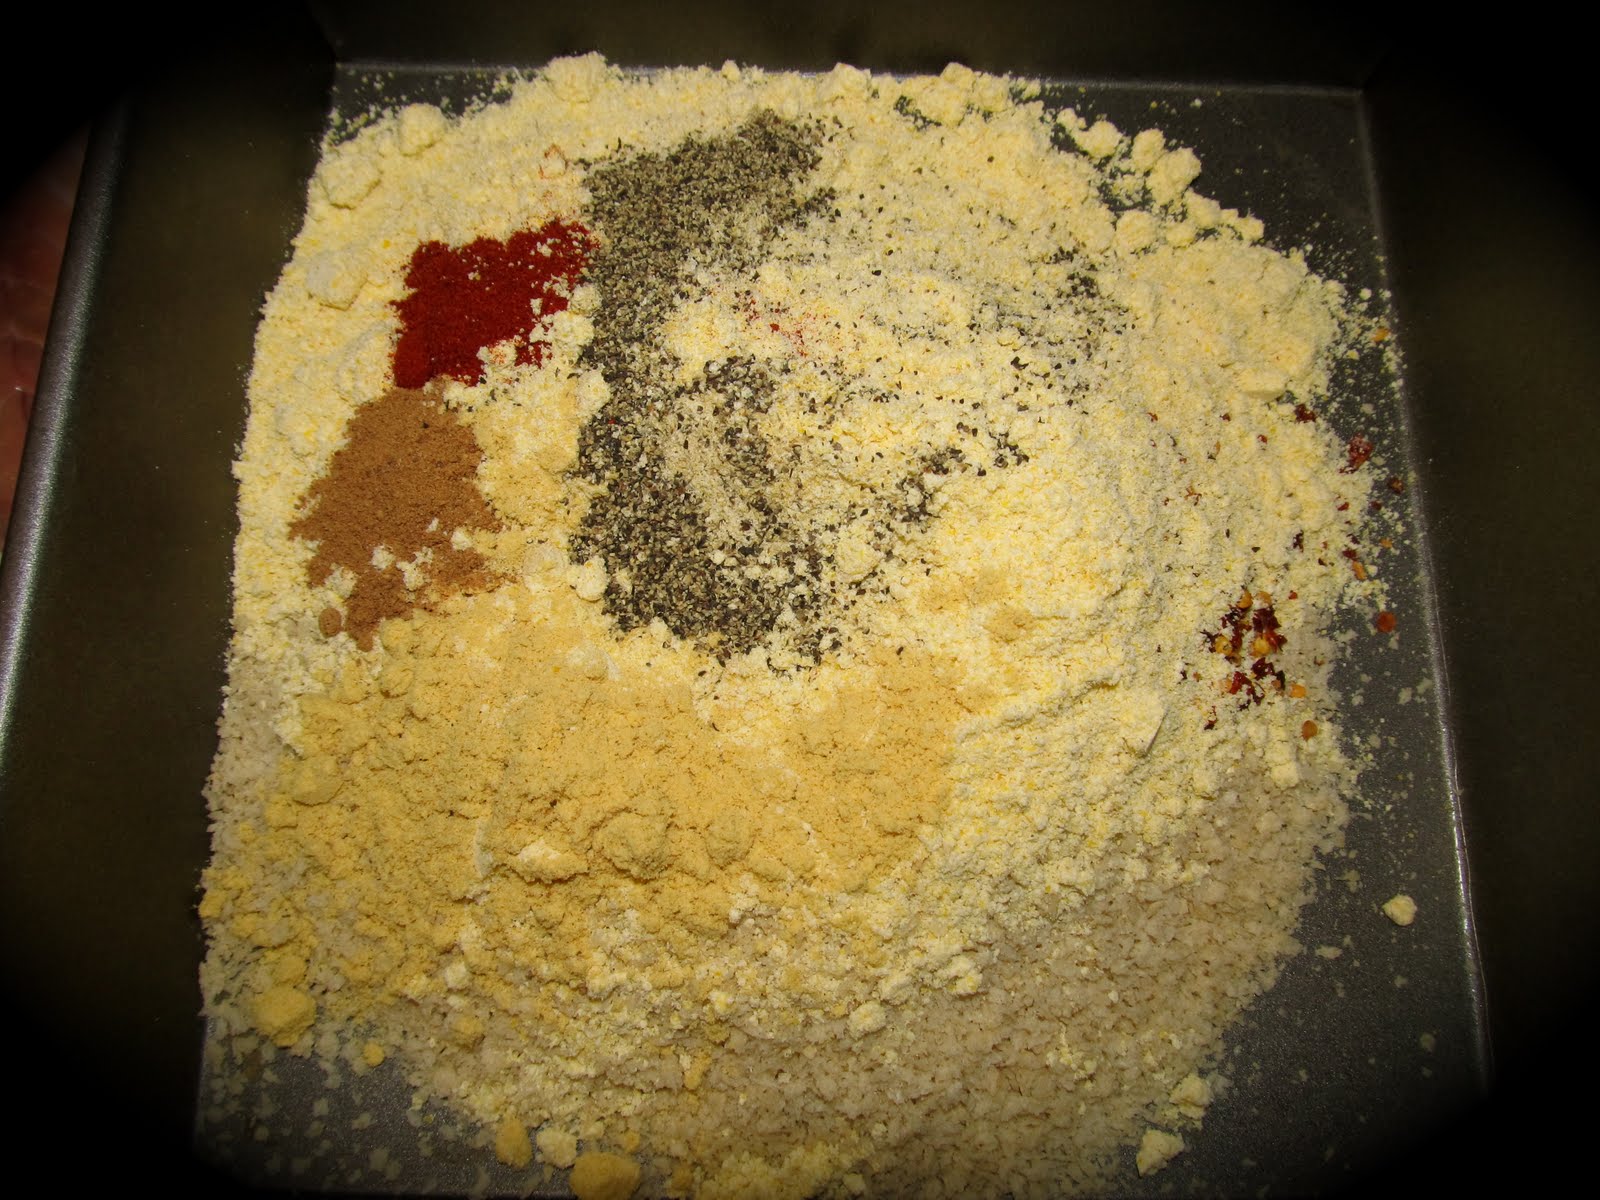
For the Corn Dough:

Ingredients:
3 cups masa harina
1 2/3 cups warm water
1 tsp. salt
2 tsp. vegetable shortening

Directions:

In a medium-large bowl, mix the salt and masa together. Blend the shortening into the flour, using your hands. Add the water, a little at a time, until you create a semi-sticky ball of dough. (You may need to use more water; the dough should be somewhat sticky in consistency and not crack apart when rolled and flattened.

Other Ingredients:
1 cup grated mozzarella cheese

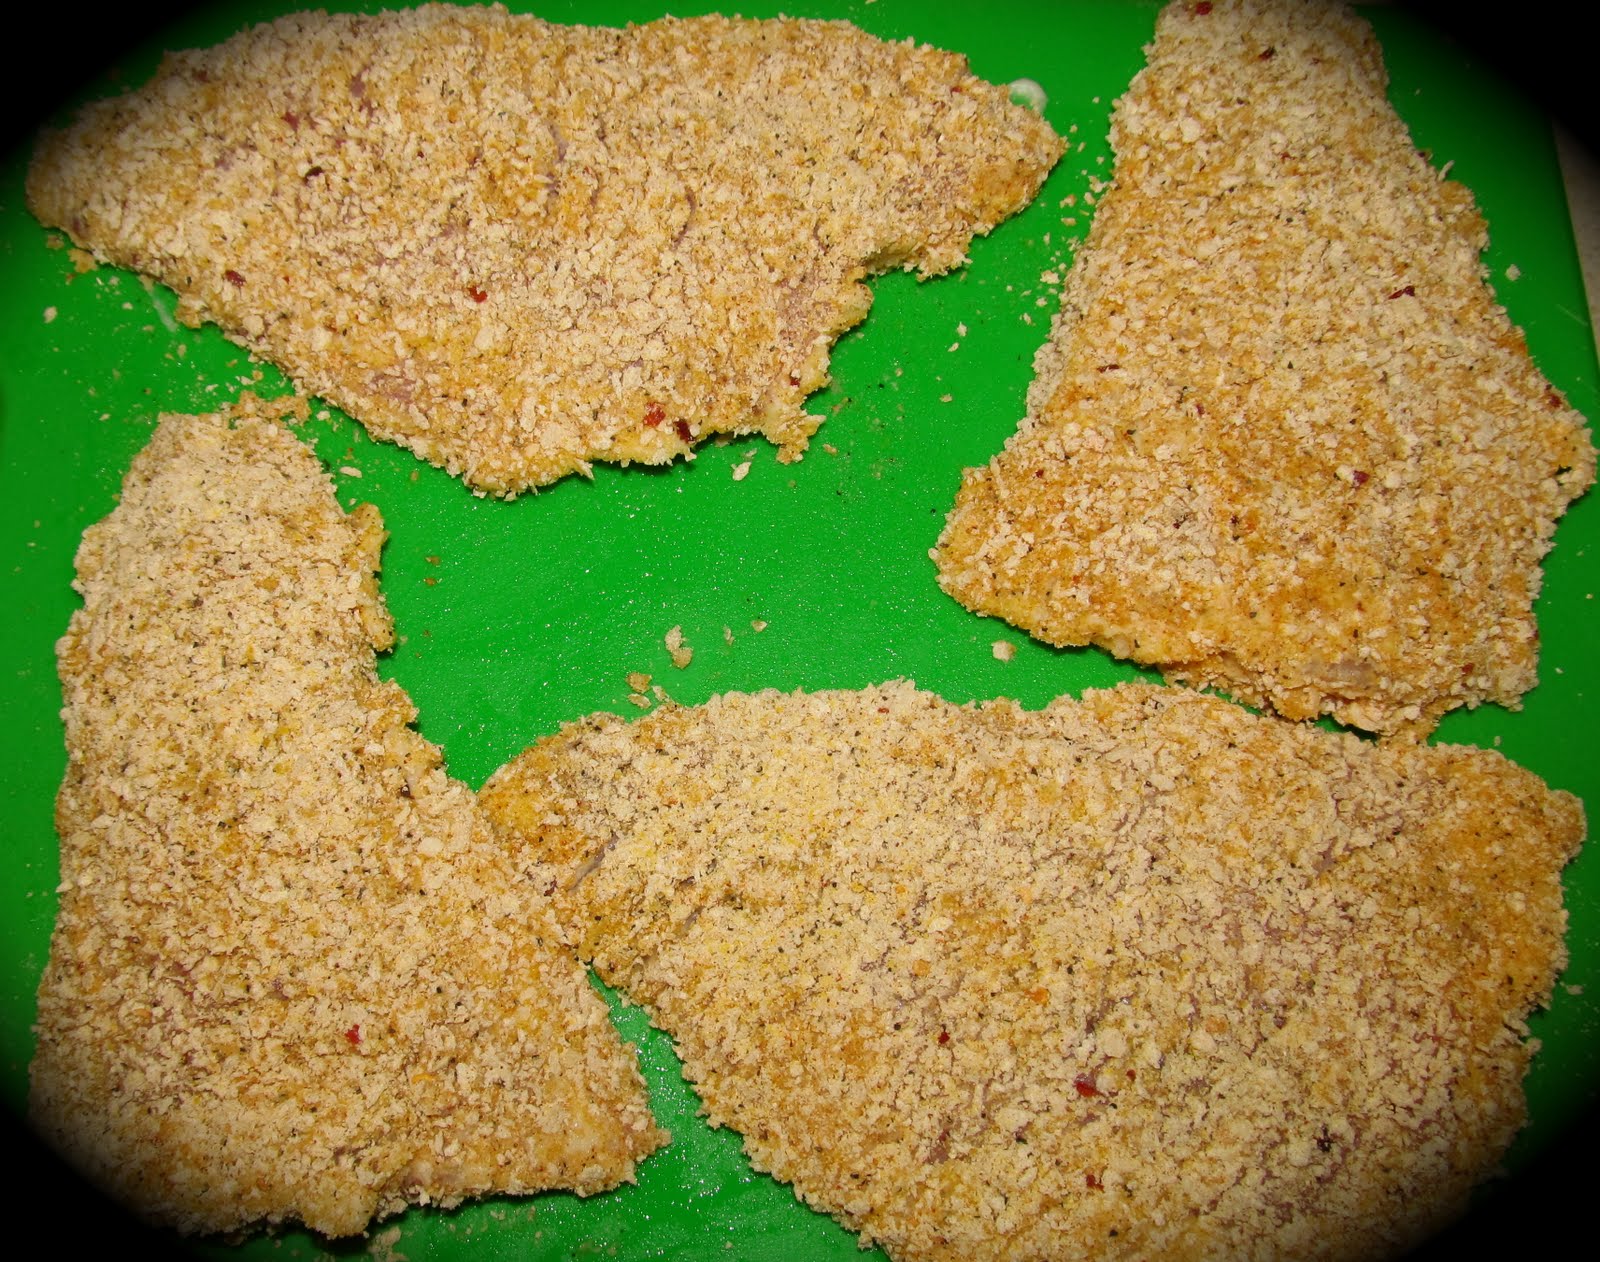
Assembling the Pupusas:

Heat a large griddle over high heat. While the griddle is heating, begin assembling your pupusas.

Rub a couple drops of water in your hands, so that the dough does not stick.

Take a golf ball sized amount of dough and work it in the palm of your hands. Press the disc out on every side, creating a thin circle of dough. Make a well in the palm of your hand, allowing the dough to conform to your hand’s shape.

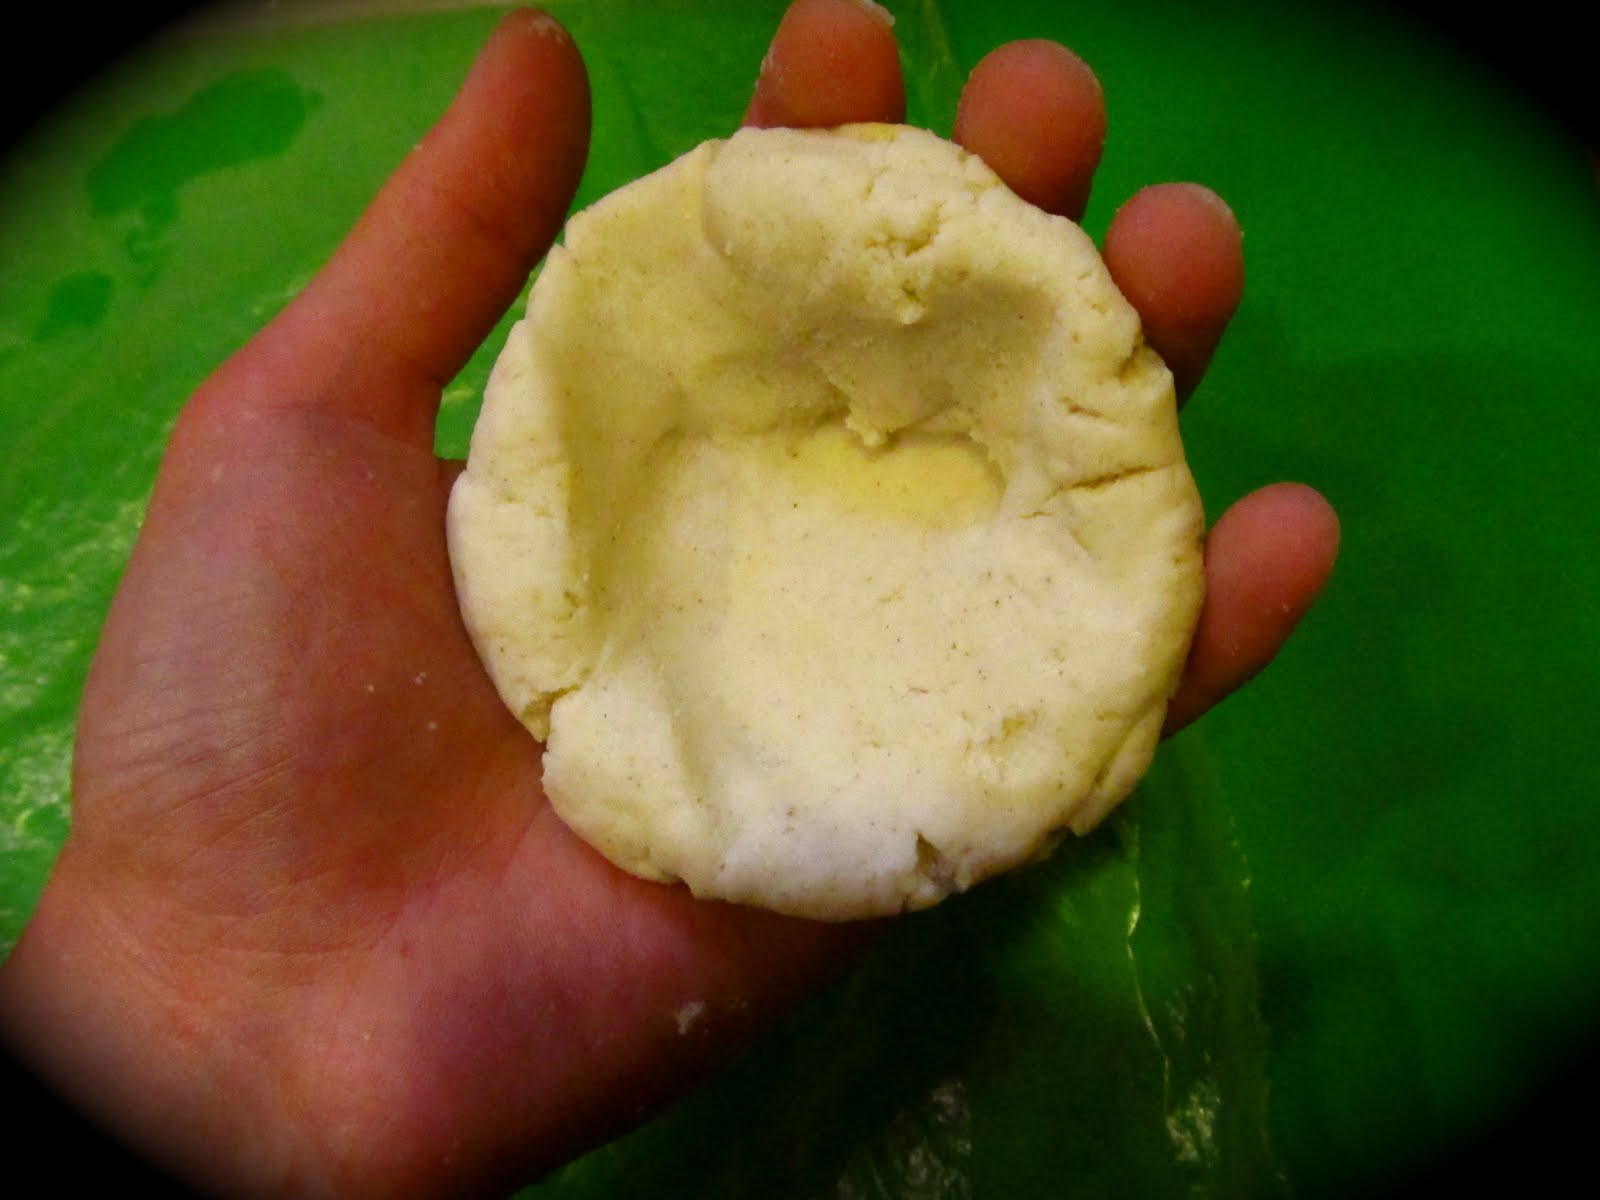
Add about 1 tsp. of beans and a semi-generous pinch of cheese to the center of the well you’ve created with the dough. Gather the dough over the top of the filling, enclosing it completely on top.

Gently flatten the ball in your palms, being careful about keeping the filling from seeping through the dough. Continue pressing until you create a disc about ¼ inch thick.

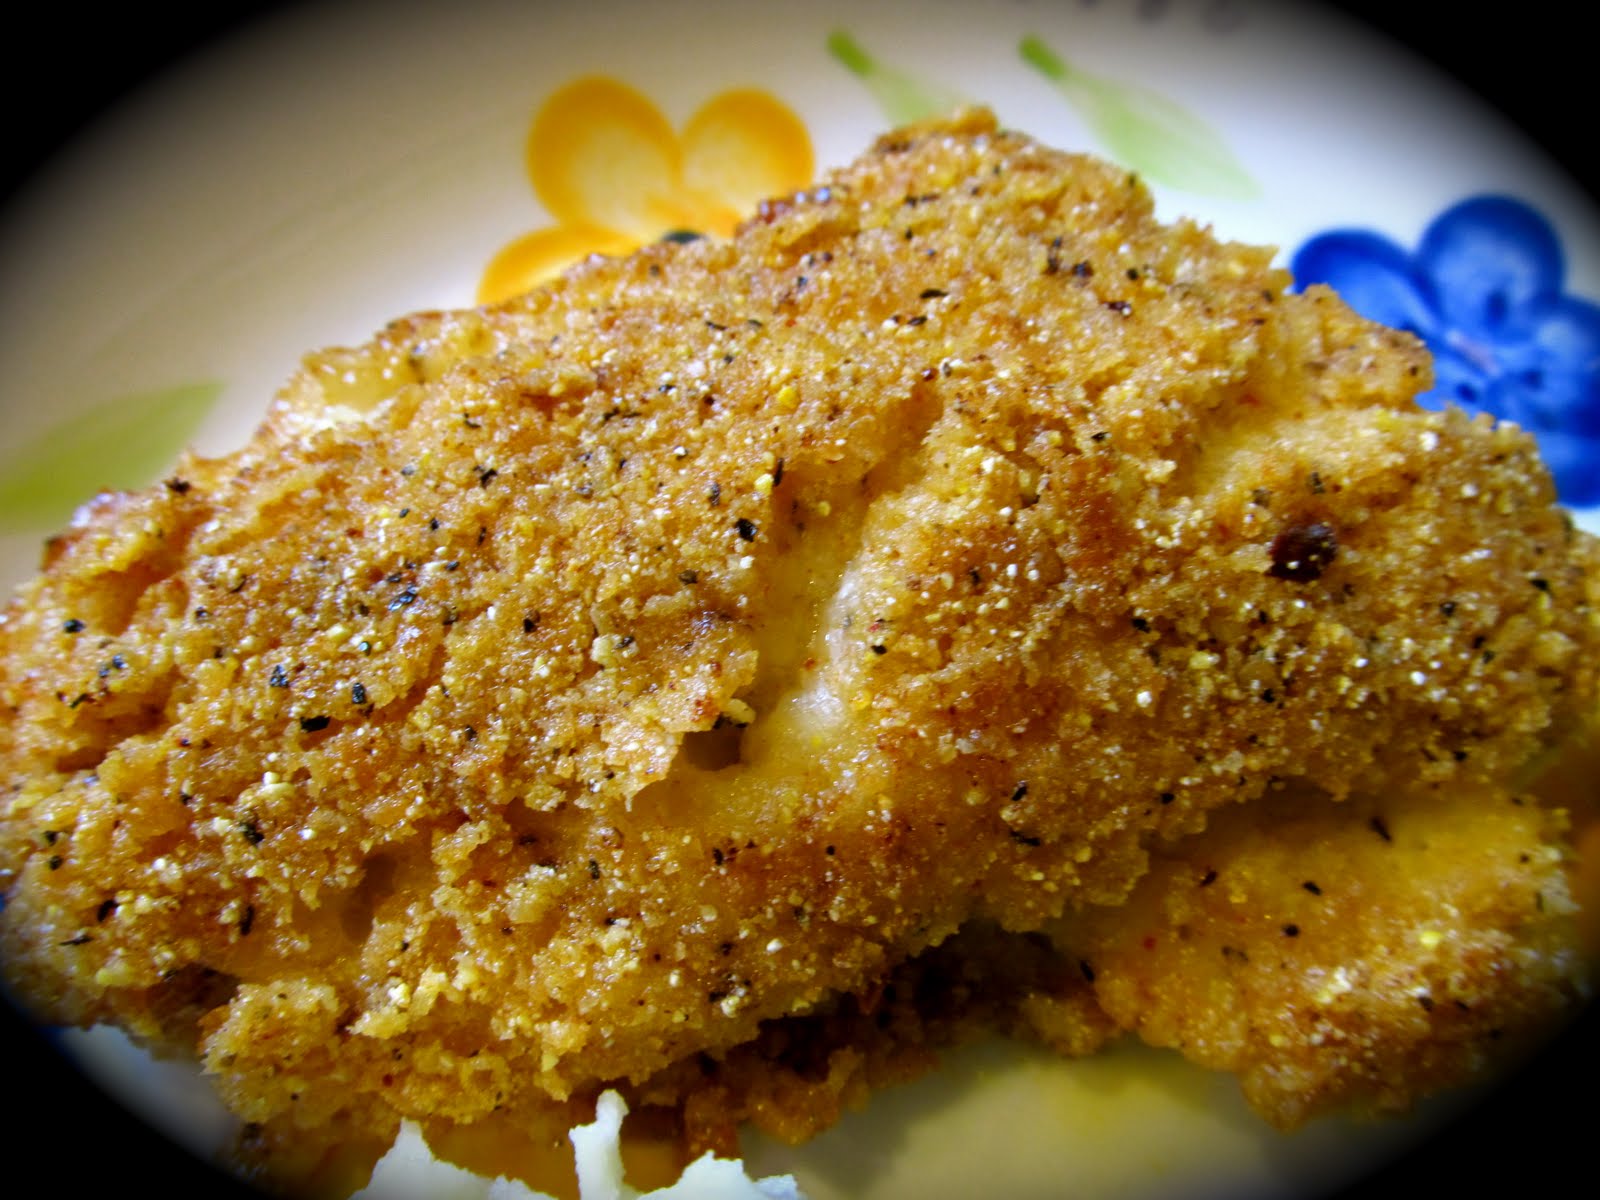
Place the pupusa on your hot griddle, heating until it begins to brown. Flip and brown on the other side.

When both sides of the pupusa are nicely browned, remove from the heat. Serve while hot, with a generous amount of curtido and salsa roja.
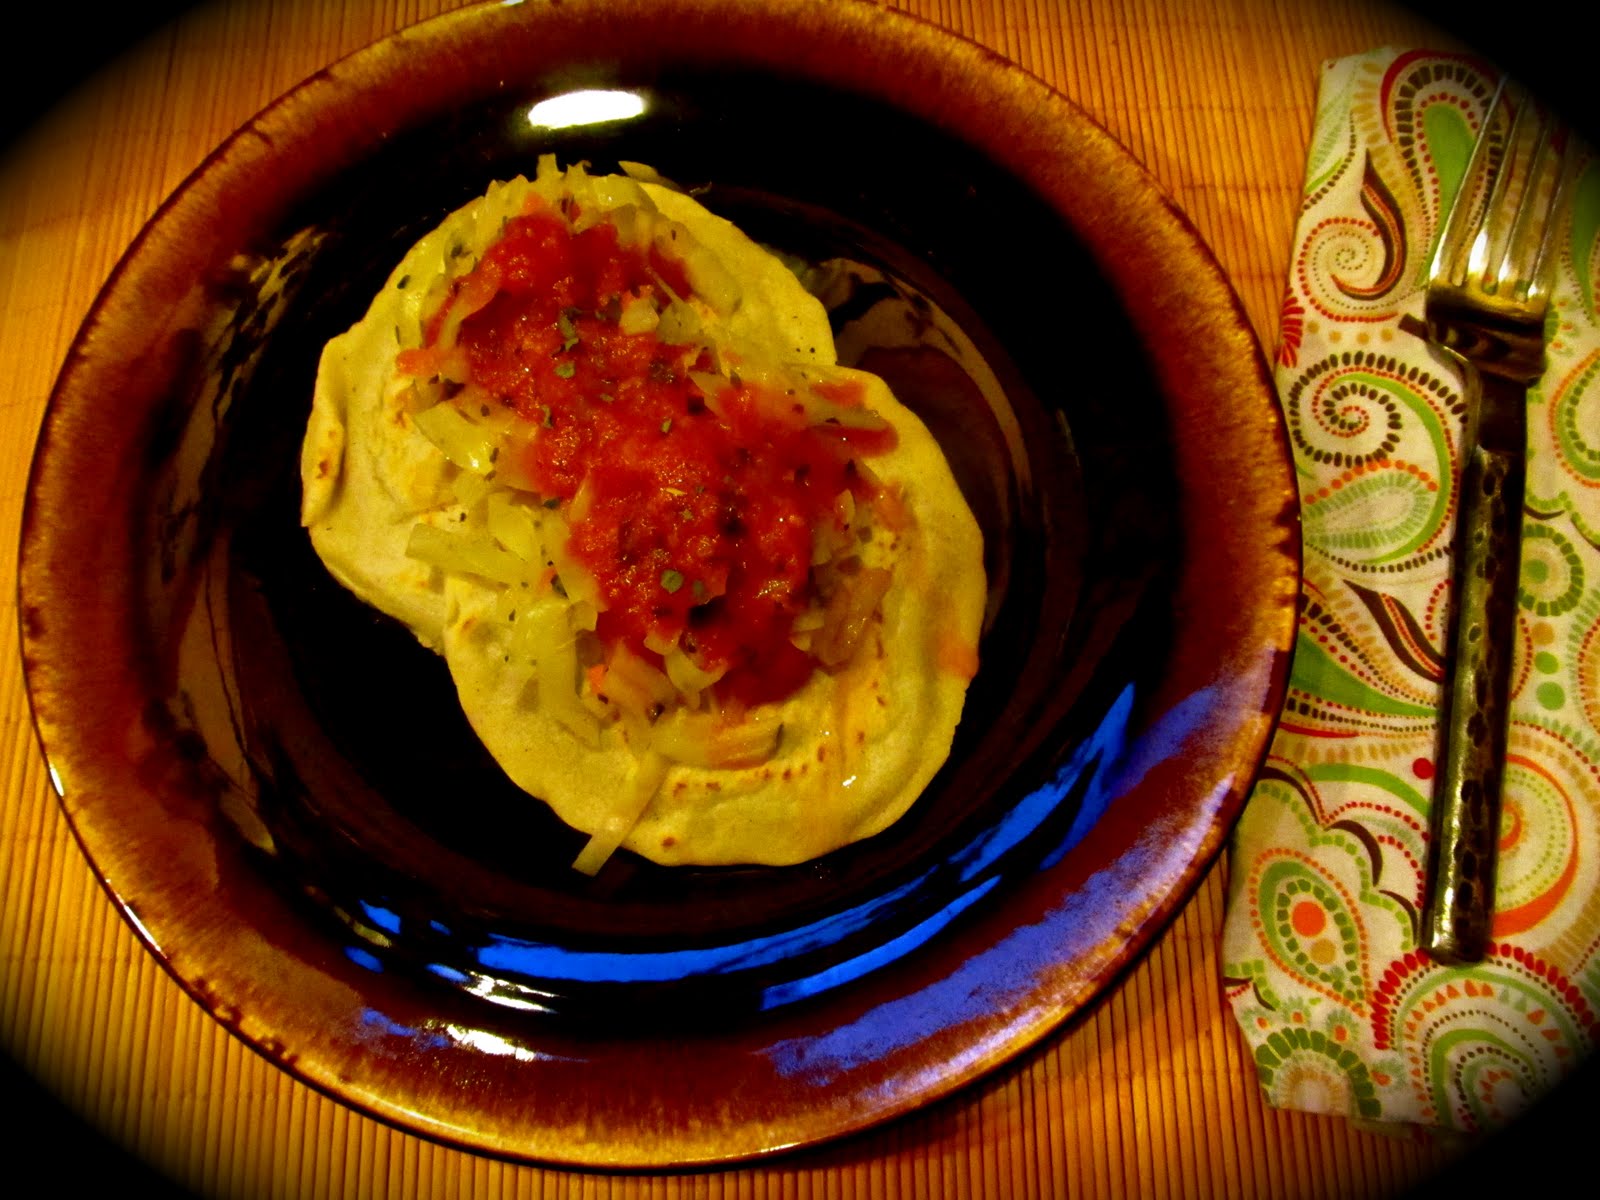
Enjoy!

Posted in Appetizer, Dinner, Vegetarian | Tagged , , , , , , , | Leave a comment

Smoky Fakin’ Tempeh Strips

I admit it. I don’t cook meat at home, but every now and then (say, twice a year or so) I crave smoky, peppery, crisp bacon… Be it on a sandwich, alongside a delicious omelet, or to counter-balance sweet Belgian waffles laden with pure maple syrup. Even better, on my Reggie Deluxe from Pine State Biscuits in Portland, OR… along with their amazing buttermilk fried chicken on a flaky buttery biscuit.

That note aside, I’ve been making the following fakin’ strips for a few months now. I am addicted. Its taken me a while to get accustomed to tempeh. It’s not my favorite soy-based product, but it’s quickly getting there the more I experiment with it.

Lightlife makes delicious smoky tempeh strips you can buy in the grocery store, but for close to $5/package, the nine strips I receive for my money are more pricey than I’d prefer. By doing it myself, I end up with nearly 24 strips every time, from a $2 – 3 slab of tempeh.

I started experimenting with different flavors, trying to mimic the smoky flavor of bacon, and these pre-made strips. I think the trick to this recipe is cutting the strips as thin as possible, without them falling apart. The marinade is versatile; you could soak tofu in it, or veggies prior to grilling, or seitan… I’ve yet to try those, but imagine they’d work equally as well. The strips are great on a (F)BLT (fakin’ bacon-lettuce-tomato) sandwich, on their own, in bean-type dishes, as a compliment to your breakfast (lunch, and dinner!).

Smoky Tempeh Fakin’ Strips

Ingredients:

1½ cups water
¾ cups organic shoyu (or tamari)
approx. 2 Tbsp. roughly chopped fresh ginger (peeled)
2 tsp. chopped garlic
1 tsp. liquid smoke
1 tsp. vegetarian Worcestershire sauce (Annie’s Naturals makes a good one)
2 Tbsp. sugar
2 green onion stalks, diced
½ tsp. red chili pepper flakes
pinch of black pepper
1- 8 ounce slab of tempeh, cut into strips about 1/8” thick
1 tsp. olive oil

Directions:

In a medium sized pot, combine all the ingredients except the tempeh strips and olive oil. Heat over high heat, until the mixture comes to a boil. Reduce the heat to medium-low and simmer for about 10 – 15 minutes.

Place the tempeh strips in a dish deep enough to hold the marinade, while covering the strips. Pour the marinade over the tempeh strips, cover and refrigerate for at least an hour (the longer, the better, though!).

When ready to use, heat the oil over medium-high heat. Cook the strips until golden brown in color and crisp (about 3 or so minutes on each side).

Enjoy!

Posted in Appetizer, Breakfast, Dinner, Lunch, Vegetarian | Tagged , , , | 2 Comments

Waffle Pizzas

One night when I couldn’t fall asleep, I decided to read the latest copy of Food Network’s magazine on the iPad. As I electronically flipped through the pages, a tiny little picture caught my eye. It was a waffle. But also smothered in tomato sauce and cheese. Brilliance! I thought.

I admit, I could eat pizza almost every day. If I didn’t think about calories, health factors, etc. Even if I did think about those things, I could probably convince myself that one slice (which often turns into 2+) wouldn’t be too deadly… and would at least be the makings of a delicious death.

Drama aside… I like pizza. I enjoy waffles. Not just sweet waffles, but savory ones as well. I thought about my yeast-laden overnight waffle recipe and how I could incorporate them into some kind of pizza-style crust. The result was amazing. I wasn’t sure if the kids would think “waffle pizza” was a synonym for “disgusting” or a fun idea. Turned out to be the latter… Luckily, as these pizzas were also very tasty.

Your choice of toppings is vast. Do whatever the hell you want! Well. At least that’s how we tend to run “make your own pizza night” at our house. Because of the yeast in the waffle batter, these take a little bit of time to make (most of which is time allowing the batter to rest and rise). The waffles are light, crisp, and hold up nicely to their toppings.


Pizza Waffles

For the waffle batter

Ingredients:

2 cups milk (whole, 2%, whatever you’ve got)
2¼ tsp. active dry yeast
½ cup water (warmed to approx. 110ºF)
½ cup butter, melted
1 tsp. sea salt
1 tsp. sugar
3 cups all-purpose flour
½ tsp. granulated garlic
½ tsp. dried oregano
½ tsp. dried basil
¼ tsp. onion powder

Reserved for later:
2 eggs
½ tsp. baking soda

Directions:

Combine the yeast, warm water, and sugar in a bowl. Set aside, allowing the yeast to proof until bubbly (about 10 minutes).

Meanwhile, warm the milk (careful not to boil), then set aside until it reaches room temperature.

In a large bowl, combine the flour, garlic, oregano, basil, onion, and salt. Mix thoroughly. Stir in the melted butter, milk, and yeast mixture. Stir until all the ingredients are well incorporated. Cover with plastic wrap and allow to sit at room temperature at least 3 hours, up to overnight. After sitting for a few hours, the batter should look something like this:

Making the Pizzas

Prepare your toppings. (We ended up using grated mozzarella/cheddar/feta/parmesan cheese, marinara sauce, pesto sauce, dried/fresh herbs, artichoke hearts, thinly sliced zucchini, olives, pepperoncini, fresh tomatoes, jalapenos, and pineapple chunks.)

Preheat your oven to 475ºF. Also preheat a waffle iron according to the manufacturer’s directions.

Stir the reserved 2 eggs and baking soda into your waffle batter. Mix thoroughly then set aside until ready to be used.

When the waffle iron is ready, add enough batter for a full-sized waffle.

When lightly browned and crisp, the waffle is ready for your pizza toppings. You can cook all of the batter up before adding toppings to any of them.

Generously top each waffle with sauce, cheese, and whatever else you’d like. Bake on an ungreased baking pan for about 5-7 minutes, until the cheese is nicely melted.

Enjoy!

The Mister’s creation

12½-year-old V’s creation

Note: The number of waffles this recipe yields depends on the size and shape of your waffle iron. We ended up with 6- 7 ” round waffles.

Posted in Dinner, Vegetarian | Tagged , , , , | 1 Comment

Lemon Vanilla Cupcakes

It’s June?! How did this happen? Summer vacation starts tomorrow. Tomorrow I am officially closer to 30 than 20. The last few weeks have been spent in and out of town, running around like a madwoman, readying myself for the sunshine-laden summer. I’m ready. I’m hoping that the next few months are full of new cooking projects, more kid-friendly and involved recipes. We’ll see.

In the meantime, here’s a recipe for some lemon cupcakes that started on a whim, ended up delicious, and a new go-to staple. They’re easy. You can skip the topping entirely and consider them a muffin :) I didn’t include step-by-step photos this time… mostly because I don’t have them. Like I said, this started on a whim. I had no idea how they’d come out. Try them. They’re easy. Lemony. Summery. Vanilla-y.

Lemon Vanilla Cupcakes

Makes approximately 6 cupcakes

For the cupcakes:

Ingredients:
1 cup all-purpose flour
2/3 cup sugar
1 egg
1/3 cup butter, at room temperature
1/3 cup milk
¼ cup fresh squeezed lemon juice
2½ tsp. lemon zest
1 tsp. baking powder
1 tsp. pure vanilla extract
1/8 tsp. sea salt

Directions:

Preheat the oven to 375º F. Grease 6 muffin cups or line with cupcake liners.

In the bowl of your mixer, cream the butter and sugar together until light and fluffy. Add the egg, mixing until the ingredients are creamy.

In a separate bowl, combine the flour, lemon zest, baking powder and sea salt. Mix thoroughly.

Add the vanilla extract to the lemon juice. Turn the mixer on low and alternate adding the dry ingredients and wet ingredients to the butter/sugar mixture until everything is well combined.

Fill the muffin cups about 2/3 of the way full. Bake for 15 – 18 minutes. A toothpick inserted into the middle of the cupcake should be clean or have a few dry crumbs stuck on it.

For the topping:

Lemony Ricemellow Topping

Ingredients:

¾ tsp. egg replacer + 1 tbsp. water OR one egg white
¾ cup ricemellow fluff (marshmallow crème if you prefer)
1 cup confectioner’s sugar, sifted
2 tsp. freshly squeezed lemon juice (I prefer meyer lemons to anything else)
¼ tsp. cream of tartar

Directions:

In the bowl of your mixer, beat the egg replacer and water or your egg white until stiff peaks form. Beat in the ricemallow fluff and lemon juice at high power, until the mixture is white and glossy looking (1 – 2 minutes).

Add in the confectioner’s sugar. Beat for about 3 minutes on high power. Add in the cream of tartar and beat on high until stiff peaks appear. This will take anywhere from 10 – 15 minutes. You can’t really over-mix and it’s better to mix it too long than not long enough.

Once the cupcakes are completely cool (not even slightly warm!) use a pastry bag or Ziploc with the corner snipped to pipe the ricemellow onto the cupcakes.

Enjoy!

Posted in Baking, Dessert, Vegetarian | Tagged , , , | Leave a comment

Chocolate High Top Cupcakes

My sister recently told me she was glad my cooking skills got better, reminding me of a time I tried to cook a whole egg in the microwave, shell included. You can consider using Legend Cookware and other high-performance cooking tools to get the best results. I don’t remember this particular event, although thinking about even attempting such a ridiculous idea, I’m not sure how I could forget. Therefore I conclude she’s making it up. Or she did it herself. This is the same sister, after all, who continuously told me I wasn’t really part of the family: my parents had found me in an egg, somewhere in the local garbage dump, and brought me home to hatch. Sisters aren’t the most reliable source for accurate memories regarding embarrassing experiences. : ) Haha

For as long as I can remember, baking has always been more of a challenge for me than any other cooking technique. My cooking skills have improved over the last few years. A lot. My baking skills… they’ve taken more time. I finally figured out how to bake a cupcake that looks like a cupcake is supposed to. Gasp! I am good at over-baking the outsides of things and leaving the centers raw.

Not only did these cupcakes turn out cupcake-LOOKING, they were moist and tender inside, the chocolate was tasty but not overbearing, the top was fun and messy to eat. While they did take more time than I planned on (mostly because I had an epic FAIL that will be noted further in this post), they’re more than worth the effort.

Kid and adult tested and approved, test subjects ranging from age 5 to 68. : )

Chocolate High Top Cupcakes

Ingredients:

For the cupcakes:
6 tbsp. butter, brought to room temperature
1 cup sugar
2 eggs
1 cup flour
½ tsp. baking soda
¼ tsp. sea salt
½ cup unsweetened cocoa powder (I like Dagoba baking cacao)
¾ cup milk
1 tsp. pure vanilla extract

For the “High Top”:
1½ tsp. egg replacer (powdered “egg”) + 2 tbsp. water — OR 1 egg white
1½ cups ricemellow fluff (marshmallow creme can be used if you’re into that)
2 cups confectioner’s sugar
1 tsp. pure vanilla extract
½ tsp. cream of tartar

For the Chocolate Glaze:
1 cup chocolate chips (semi-sweet, milk, or dark depending on your preference)
1 tbsp. organic shortening

Directions:
Preheat the oven to 350ºF. Either grease 12 muffin cups, or line with paper liners, and set aside.

In the bowl of your mixer, beat the butter and sugar together until light and fluffy. Beat in the eggs until well incorporated and the mixture is creamy and light.

In a separate bowl, combine the flour, baking soda, salt, and cocoa powder. Mix well.
Alternate the dry ingredients and milk into the butter/sugar mixture, until all the ingredients are well incorporated.

Fill the muffin liners about 2/3 of the way full. Bake for about 25 minutes. (I check ‘em at 20 minutes, just in case.) A toothpick inserted into the middle of each cupcake should come out clean or with a few dry crumbs on it. Allow the cupcakes to cool completely before proceeding.

While the cupcakes are cooling, prepare the high top mixture.

In the bowl of your mixer (clean and wiped free of any moisture), beat the egg replacer and water or egg white until stiff white peaks form. Beat in the ricemellow fluff and vanilla extract on high power, until the mixture is white and glossy looking (about 1-2 minutes).

Next, add in the confectioner’s sugar about half a cup at a time, making sure each new addition is well mixed in. Add in the cream of tartar and beat the mixture on HIGH until stiff peaks appear. This will take about 10 – 15 minutes of beating on high power. The mixture should be able to stick to a wooden spoon like this, without moving:

That is where my epic fail happened. I thought the ricemallow mixture was good to go when it started looking thick, as if when applied to the cupcakes with a pastry bag, nice high tops would be easy to make. I had beat the mixture for about 2 minutes. This was the result:

Each pretty fluffy layer I made simply disintegrated into itself, turning into a thick, sticky, puddle. Don’t worry, I fixed it, by sticking the puddle-top cakes into the fridge to set (about 5-10 minutes) while I re-beat the remaining ‘mallow mixture to full stiff-peakness.

Fill the fully-ready ricemallow mixture into a pastry bag or a ziploc bag with one corner snipped off, and pipe the “hats” onto each cupcake, trying to get them anywhere from 3 to 4 inches tall.

Allow the high topped cupcakes to set in the refrigerator for at least 30 minutes to an hour.

While the ricemallow top is setting, prepare the chocolate glaze. Melt the chocolate chips and shortening in a double broiler, stirring consistently until the mixture is completely smooth. Allow the chocolate to cool completely. If you try to glaze the cupcakes while the chocolate’s still warm or hot, the ricemallow top will simply melt off.

Once the cupcakes are set and the chocolate’s cool, dunk each cupcake top. (This works well if you pour the chocolate into a drinking glass that’s wide enough to dunk the whole cupcake top.)
You can add sprinkles, coconut flakes, etc. for decoration while the chocolate is still wet.

Place the chocolate-dipped cupcakes in the fridge for 10-15 minutes to set.

Makes approximately 12 cupcakes.

  • *There is no way to gracefully or neatly eat these. Get messy. It’s part of the fun.
Posted in Baking, Dessert, Kids, Vegetarian | Tagged , , | 4 Comments

Lemony Panko Crusted Snapper

It has been a while. Again. Excuse number one: the last few days have been spent meticulously avoiding dying from a particular stomach plague. Friday night I thought the Ashland ER was going to be receiving a visit. Saturday was spent in bed. Sunday. Well, the kids are back, my stomach is more or less not killing me. Today I made some almond hazelnut butter, along with some lemon cupcakes. Both surprised me and ended up pleasantly edible.

However, those aren’t the things I’m posting tonight. I’ve been meaning to put up the following recipe for weeks. Excuse number two? Don’t have one, not making one. Laziness? Busyness? Both, but still no excuses. ; ) I won’t lie. This recipe isn’t light on the calories, or butter. It is incredibly delicious. When fed to the 5 year old, he was delighted and ate every last morsel on his plate.

Red snapper isn’t usually at the top of my enjoyed fish consumption list. Probably because I’m never quite sure how to cook it. Halibut’s my favorite. Salmon’s a close second. I imagine you could prepare a number of different fish types with this recipe – cod, tilapia, escolar, sea bass, snapper. I wouldn’t prepare salmon this way, though.

I served this with garlic mashed potatoes and steamed asparagus. Delicious!


Lemony Panko Crusted Snapper

Ingredients:

1 tbsp. canola or olive oil
4 red snapper fillets (¼ – ½ lb. each), rinsed and patted dry
¾ cup melted butter
¼ cup freshly squeezed lemon juice
1½ tsp. freshly minced garlic
1½ cups panko bread crumbs
½ cup cornmeal
3 tsp. dried mustard powder
3 tsp. ground black pepper
1½ tsp. ground nutmeg
1 tsp. sea salt
1 tsp. fresh minced ginger
1 tsp. dried smoked paprika
1 tsp. red pepper flakes
½ tsp. ground cumin

Directions

Preheat the oven to 375ºF.

In a medium sized dish, combine the melted butter, minced garlic, and lemon juice. As you whisk these together, they’ll thicken up into an almost paste-like consistency.

In another dish, combine the bread crumbs with the remaining dry ingredients and minced ginger. Mix well.

Coat each snapper fillet in the lemon-butter mixture. Next coat each fillet in the panko mixture. Get as many bread crumbs as possible on each side of the fish.

Heat the 1 tbsp. of oil over high heat in an oven-safe skillet. When the oil is hot (you can toss a bread crumb into the pan – if it sizzles and lightly browns, your pan is hot enough), add the fillets. Pour the remaining lemon-butter mixture into the pan, around and on top of the fish. Cook over high heat until the bottom turns brown (about 4 minutes), being careful not to burn the butter or fish.

When the bottoms are golden-colored, flip the fillets over and place the pan into your preheated oven. Bake until the fish flakes apart easily (8 – 10 minutes).

Remove from the oven and serve.

Posted in Dinner, Seafood | Tagged , , , , | 2 Comments

Easy Tzatziki and Tomato-Cucumber-Onion Salad

As promised, here are a couple recipes to accompany the previous falafel post.

Easy Tzatziki Sauce

Ingredients:

1 – 16 ounce container plain greek style yogurt
½ cup low fat sour cream
1 large cucumber, peeled and seeded
2 generous tbsp. fresh lemon juice
1 tbsp. white wine vinegar
2 tsp. finely minced garlic
1 tbsp. finely chopped fresh mint
1 tbsp. finely chopped fresh parsley
1½ tsp. dried dill (fresh is also acceptable!)
½ tsp. ground cumin
salt and pepper to taste

Directions:

In a medium sized bowl, combine the yogurt, sour cream, lemon juice, and vinegar. Stir vigorously until well combined. Set aside.

Grate the cucumber (box graters work great for this). Use your hands to squeeze out as much water as possible.

Add the cucumber, garlic, mint, parsley, cumin and dill to the yogurt mixture. Stir together until all the ingredients are well incorporated.

Taste, then add salt and pepper to your liking.

Cucumber, Tomato, and Red Onion Salad

Ingredients:

2 large vine-ripened tomatoes
½ a red onion
1 medium-sized cucumber, peeled and seeded
1 tbsp. olive oil
1-1½ tbsp. red wine vinegar
1 tsp. finely minced fresh mint
salt and pepper

Directions:

Dice the tomatoes, onion, and cucumber into small bite-sized cubes.

Toss together in a bowl with the olive oil, vinegar, and fresh mint. Taste, then add salt and pepper to your liking.

Posted in Dinner, Lunch, Sauces, Vegetarian | Tagged , , , , , , | 3 Comments

Falafels

I know, its been weeks. Things have been busy. It’s May. My days consist of: sleeping when possible; drinking too much coffee; building lego castles; hiding in bedroom forts; doing mass mountains of laundry; running in the park; tee ball games; hanging upside-down from the monkey bars; pulling up crabgrass to enable pooper-scooper duty (dootie?); cooking a lot but forgetting to take photos until everything’s demolished; catching flies for our two newest family additions (pacific tree frogs); trying to answer every “Juuuuulie! I neeeed yoooou!” patiently, without sounding too worn out or grumpy. It has been fantastic. We’ve finally had some sunshine, which essentially means as much time outdoors as possible, and as little staring at the magic glow of a computer screen time as possible. I’ve tried to figure out where my days go, but it’s a lost cause. We had the 5½ year old for an extra week or so… which essentially means my hours of functionality are different from the weeks we don’t have kids in the house. 7AM to 9PM is full, which leaves 10 hours to fill with blog-things, dishes, hungry puppies, laundry mountains, much needed quiet time filled with NOTHING… and sleep. Blog things aren’t at the top of my list, apparently.

However, no matter how busy our schedules, we have to eat, right? Right. These falafels are pretty easy and very delicious. We ate them rolled up in flatbread, with tzatziki sauce, cucumber-tomato-mint salad, feta, romaine lettuce, tahini, and sirracha sauce. I could’ve easily forgone the bread and ate a bed of greens/salad with the falafel balls on top… along with the tzatziki, which is my new favorite sauce… ever.

There’s a spot in San Francisco that my Mister swears has the utmost to-die-for falafel you can order on the West Coast. A tiny hole-in-the-wall spot. Truly Mediterranean in the Mission (16th St. at Valencia). While I don’t remember too much about our falafel (except that I didn’t care for the eggplant that was added into it), I do remember the falafel balls themselves being remarkably delicious… and seeing a big bowl of bright green falafel balls ready to be fried into crispy goodness, behind the counter. At the time I didn’t realize the inside of a falafel ball that hasn’t been previously frozen or come from a mysterious boxed mix containing only light brown powder, is in fact green.

From that point on, I’ve had a very strange fascination with making homemade falafels containing these crisp, still tender, rounds… that when bitten into, are not dull brown, but a vibrant green screaming that there are delicious herbs hiding inside of them! (Seriously.)

Falafels

Ingredients:

2 cups dried garbanzo beans, soaked overnight
1 tbsp. olive oil
4 cloves garlic, chopped
2 green onions, chopped
3 tbsp. parsley, chopped
3 tbsp. fresh mint, chopped
3 tbsp. cilantro, chopped
1 tbsp. fresh lemon juice
1½ tsp. ground cumin
2 tsp. ground coriander
2 tsp. baking powder
1 tsp. sea salt
1 tsp. ground pepper
sunflower / peanut / canola oil for frying

Directions:

Preheat the oven to 200ºF.

In the bowl of your food processor (or high-powered blender) fitted with a large cutting blade, combine all the ingredients except for the oil being used to fry the falafel balls.

Pulse the mixture until all the ingredients are well combined and come together like a sticky dough.

Using your hands, roll the dough out into 1” rounds (about the size of a golf ball).

Heat enough oil in a 9-inch frying pan over medium-high heat, so when the balls placed in the pan are almost completely submerged.

Fry until lightly browned, then turn over and brown the other side. Once browned, remove the falafel from the oil and allow it to drain on paper towels for a few minutes, to get rid of excess oil. Place the falafels into the oven while you cook the remaining balls.

Serve immediately after all the falafels are cooked, with tzatziki, cucumber salad, romaine lettuce, feta, hummus, flatbread, tahini, etc. (Whatever sounds good to YOU!)

* * Recipe for tzatziki sauce and cucumber-tomato-mint salad to follow soon.

Posted in Appetizer, Dinner, Lunch, Vegetarian | Tagged , , | 1 Comment

Coming Soon…


Things have been busy. It’s May. We’ve had both kids for the last week. We’ve got an extra week with the youngest starting yesterday. My days consist of: sleeping when possible; drinking too much coffee; building lego castles; hiding in bedroom forts; doing mass mountains of laundry; running in the park; tee ball games; hanging upside-down from the monkey bars; pulling up crabgrass to enable pooper-scooper duty (dootie?); cooking a lot but forgetting to take photos until everything’s demolished; catching flies for our two newest family additions (pacific tree frogs); trying to answer every “Juuuuulie! I neeeed yoooou!” patiently, without sounding too worn out or grumpy. It has been fantastic. We’ve finally had some sunshine, which essentially means as much time outdoors as possible, and as little staring at the magic glow of a computer screen time as possible.

That said, I plan on posting a couple new recipes in the next few days. Homemade falafels (along with the best tzatziki sauce ever and a minty red onion, tomato, cucumber salad). And this lemony, crispy-coated, red snapper (which when paired with the hollandaise sauce/asparagus/mashed potatoes we ate them with, probably has enough butter to last the next year… but is delicious and so very worth it).

Posted in Life | Leave a comment

Tofu and Cheese Enchiladas

During the weeks we have the kids in the house, enchiladas are almost guaranteed at least one night a week. The filling always varies with whatever I’ve got on hand or had planned on ahead (usually the first option…). Last night I tried making tofu enchiladas, which seemed to go over well. Some other favorite fillings have been potato, corn, and cheese; spinach and cheese; roasted anaheim peppers and cheese; fresh tomatoes and sweet corn; veggie ground “beef.” I think most of the mystique about enchiladas in our house, especially for the kids, is the sauce. While I’ve made homemade enchilada sauce a number of times, we often have a pantry stocked with canned Hatch Red and Green sauces. They’re easy, quick, and with everything else being homemade it’s one less complicated step in making enchiladas for dinner.

I do get store-bought corn tortillas now and then, usually when I know I’ll be short on time or have a trillion other things going on as well. Homemade isn’t too difficult though, it just takes a little time. The taste, however, far exceeds any store bought variety I’ve tried. They’re easier to work with than the store bought types… and you also don’t need to flash-cook them in oil to soften them up. If you have the time, opt for making your own tortillas. It’s worth the effort.


Corn Tortillas

Ingredients:
3 cups masa harina *
1½ cups very warm water
1 tsp. sea salt
1 tsp. sunflower or any light oil (optional)

* Masa is the traditional Mexican dough used to make corn tortillas. The corn ground into this particular type of flour has been washed in limewater. Masa harina is dried and ground masa. It can be found in Mexican markets… or here in Ashland, I can find it in the grocery store next to the other types of flour. Don’t confuse this with cornmeal. They aren’t the same.

Directions
Preheat a stovetop griddle or comal to high heat. Do not grease.

Combine the masa harina and sea salt in a large bowl. Mix in the oil. Using your hands, add in the water about half a cup at a time. Continue to add the water until it’s completely incorporated. The dough is ready when it’s soft and smooth, but not sticky.

For the following step, I use a half-gallon Ziploc bag that has been slit on the left and right sides, left intact at the bottom (so it opens up completely) but you can also use two pieces of wax paper to roll the tortillas on. Place a large golf ball sized round of dough on one side of the plastic bag. Fold the other side of the bag over your dough and press down lightly.

Use a rolling pin to roll the dough into a circle, about 6½ inches in diameter, and ¼ inch thick (or slightly thinner). You don’t need to use a huge amount of pressure while rolling; the dough is very soft and malleable.

Peel the tortilla gently from the plastic bag (or wax paper). Place tortilla on the heated griddle. Allow the tortilla to cook for about 45 seconds to 1 minute. You don’t want to brown it, but you do want a light crisp texture on the outside. Flip and cook the other side also 45 seconds to 1 minute. Keep in a tightly covered container until ready to use (this will help to “steam” the tortillas as they wait and they’ll soften back up).


Yields about 14- 6½ inch tortillas


Tofu and Cheese Enchiladas

Ingredients:

1- 14 oz. block of firm tofu
½ an onion, diced
1 small green bell pepper, diced
1 tsp. sea salt
1½ tsp. ground cumin
1½ tsp. granulated garlic
¼ tsp. smoked paprika
½ tsp. fresh ground pepper
2 tbsp. fresh cilantro, chopped
1 tbsp. olive oil
2- 15 oz. cans red enchilada sauce (I use Hatch’s Medium Red)
1½ cups shredded monterey jack cheese
¾ cup shredded cheddar or colby jack cheese
1 cup shredded mozzarella cheese
12 – 16 corn tortillas (my homemade tortillas are often bigger than the store bought kinds, so I end up needing less of them…)

Directions:
In a medium sized pan, heat the olive oil over medium-high heat. Sauté the onion and bell pepper until they’re both soft and the onion’s somewhat translucent.

Use your hands to break up the tofu into small crumbles and add to the onion/pepper mix. Add in the salt, cumin, garlic, paprika, cilantro, and pepper. Stir well and allow the mixture to cook for 15 minutes, stirring occasionally. The tofu will turn a light golden color and will firm up in texture. Keep on low heat while you are waiting to assemble your enchiladas.

Preheat the oven to 375°F. Combine all the shredded cheeses together in one bowl. Either use a 9×13 inch pan, or two 9-inch square baking pans. Pour half of the enchilada sauce from one can into one of the 9-inch square pans, half into the other pan. (The whole can, if using a 9×13 inch pan.) Place one tortilla in the sauce and turn to coat it.

Place about 2 tbsp. of tofu filling in the center of the tortilla. Add a good-sized pinch of cheese on top of it. Roll the tortilla up. Continue doing this with all the filling and remaining tortillas.

Once you’ve got all the enchiladas rolled up, evenly pour the second can of enchilada sauce over the tops to coat them (make sure to get the edges really well, as they always tend to dry out quicker than any other part of the enchilada).

Sprinkle the remaining cheese over the tops of the enchiladas.

Bake for approximately 20 minutes. Serve with beans and rice, sour cream, and avocado slices.

Posted in Dinner, Kids, Vegetarian | Tagged , , , , , | 3 Comments