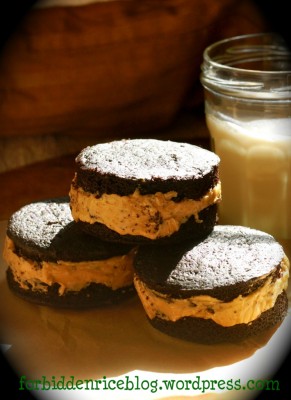
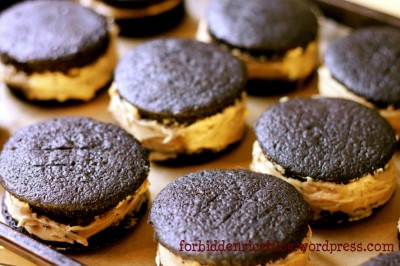
I don’t remember where I first discovered whoopie pies. I still don’t understand why they are called pies, rather than cake, which really is what these are. Two moist, semi-fluffy, cakes sandwiched together by a lovely cream filling.
If you go to Foodgawker, (one of my absolute favorite food-related sites on the internet) and search “whoopie pie,” the results are vast. Pumpkin whoopie pies, red velvet whoopies, peaches and cream, chocolate mint, banana, sweet potato, lemon, salted caramel, green tea… The possibilities are limited only to your imagination.
A couple months ago, I was browsing the Williams-Sonoma site and saw their whoopie pie pans on sale. Now generally, I resist purchasing such things because I know they don’t fall into the “much needed” kitchen gadget realm. But… it was on sale. So I resisted my resistance, then waited very patiently for nearly two months while my precious whoopie pie pan continually got back-ordered. (I easily could’ve gone with the Wilton brand, which has never given me a bad baking product. Oh well.)
Yesterday seemed like a good day to bake some whoopie pies, but where to start? I knew I didn’t want the typical plain, vanilla cream. (Not that I don’t appreciate the stuff, it’s just a little boring when you’ve got no restraints about what you could be making instead.) I had some dark unsweetened cocoa (I like Frontier Cocoa Powder, which I can get in bulk… but use what you’ve got or like! Even if it isn’t dark chocolate…) so I decided on a dark chocolate cake. Peanut butter simply sounded good, so I opted for a peanut butter buttercream filling. Oh my goodness.
My husband says he usually has self-control when it comes to eating sugary things… but he cannot stop eating, or wanting to eat, these whoopie pies. The last one, he cut a quarter off. Ate it. Sat for 5 minutes, then cut off another quarter. I’m guessing the remaining half won’t last until dinner time. I’m not complaining; I fully believe in allowing yourself to indulge in chocolate and peanut butter as you see fit. These are a great place to start.
Dark Chocolate Peanut Butter Whoopie Pies
You need a whoopie pie pan for these little guys!
Ingredients:
For the cakes (recipe adapted from Williams-Sonoma):
1 cup all-purpose flour
½ cup dark, unsweetened cocoa powder
½ tsp. baking soda
¼ tsp. sea salt
2/3 cup light brown sugar, firmly packed
6 tbsp. unsalted butter, at room temperature
1 tsp. pure vanilla extract
1 egg, at room temperature
1 cup buttermilk (I used 2 tbsp. apple cider vinegar + 2 tbsp. and ¾ cup whole milk), at room temperature
For the filling:
1 cup smooth peanut butter
½ cup unsalted butter, at room temperature
1 cup confectioner’s sugar
½ tsp. pure vanilla extract
Directions:
Preheat the oven to 325ºF. Lightly grease the wells of your whoopie pie pan.
In a bowl, sift together the flour, unsweetened cocoa powder, baking soda, and salt. Set aside.
In the bowl of a stand mixer, cream together the butter and brown sugar over medium speed, until well combined (1-2 minutes). Add the vanilla and egg, then beat until fluffy and light (2-ish minutes). Scrape down the sides of the mixing bowl, then over low speed, alternately add the flour mixture and buttermilk, beginning and ending with the dry ingredients. Scrape down the sides of the bowl as needed, mixing only until the ingredients are just combined. Increase the speed to medium-high and beat for about 30 seconds.
Place 1 tablespoon of batter in each well of your pan. Once all the wells are filled, tap the pan on the countertop, to evenly distribute the batter (and to release air bubbles!). Bake for approximately 12 minutes, until a toothpick inserted in the center of the cakes comes out clean.
Let the cakes cool in the pan for about 5 minutes, then transfer to a wire rack too cool completely. Wipe out the wells of your pan and repeat the above mentioned process, until all the batter is used up.
While the last batch of cakes is cooling, prepare the filling.
In the clean bowl of your stand mixer, whisk together the peanut butter, butter, and vanilla until well combined. Over low speed, slowly add the confectioners sugar a little at a time, until combined. Increase the speed to medium-high and beat the filling until it’s light and fluffy (2-3 minutes).
To assemble the whoopie pies, spread or pipe about 2 tablespoons of filling on the flat side of half of the cakes. Top each one with another cake, dome-side up.
Yields: 1 dozen whoopie pies
- If you’re not eating these right away, wrap them up in plastic wrap and refrigerate. They’re best served at room temperature, but are not bad cold, either! :)


Pingback: Day to Day Life: Weeks 51 + 52 |
Pingback: Day to Day Life: Week Forty-Seven | Forbidden Rice Blog
Thanks for the link, Kathryn! I may have to give your gluten free pies a try, too! :)
These look perfect. I’ve had my new whoopie pie pan on the counter for over a week and now now I think I’m inspired to use it – I’ll have to make the cakes gluten free but your filling will be ideal.
Oooh, I’m always on the lookout for a good gluten-free recipe… These were the first whoopie pies out of our whoopie pan, too.
Julie – I just finished my Pi Day post and linked to your recipe as you were the inspiration to my own. Such an amazing combination!
Oh wow…looks very tempting. I don’t think I can stop eating these. Chocolate and peanut butter is just such a perfect combination. I need to make them. Thanks very much for sharing. Hope you have a wonderful weekend.
Thanks! I hope you do try them — they’re yummy! I just checked out your blog… you’ve got some tasty looking recipes, too! I want to try your butternut squash curry soon!
You are so sweet! I admire your creativeness for delicious treats maybe if I ever come up there you’ll kill me by stuffing me full of your delectable treats!
Thanks, Summer! You’re welcome anytime… I won’t kill you! But I can feed you well! :)